Terrain Modeling in Rhino
A tutorial on terrain modeling with RhinoTerrain.
 res = 5.0
Contents
res = 5.0
Contents
Terrain Meshes
This tutorial covers how to generate meshes from point clouds and raster elevation data in Rhino using the RhinoTerrain plugin. The 3D modeling program Rhino has plugins for terrain modeling, 3D rendering, and computer aided manufacturing (CAM). With Rhino and its ecosystem of plugins you can model, visualize, and digitally fabricate landscapes and cities. To learn the basics of Rhino watch this overview of the user interface and read the user guide. The RhinoTerrain plugin can import geospatial data including point clouds, rasters, and vector datasets and can efficiently compute triangulated irregular networks (TIN), e.g. terrain meshes, from this data. See the tutorials on 3D printing a city and computer numerical control (CNC) surface milling to learn about digitally fabricating terrain models.
Lidar
Model a terrain mesh for Governor’s Island, NYC from the 2014 airborne lidar survey. Terrain data is often captured by airborne lidar or terrestrial laser scanning. RhinoTerrain can import .las lidar point clouds and generate terrain meshes from them. Note that older versions of RhinoTerrain may not be able to read newer .las specifications. Search for lidar data from the 2014 survey of Governor’s Island at https://orthos.dhses.ny.gov/. Download the tiles 18TWL820030.las and 18TWL820045.las.
Either run the command RtImportLas in the command line
or in the RhinoTerrain menu
select Import / Export and then Import las.
Import 18TWL820030.las
and then
18TWL820045.las.
Points will be imported onto new layers by class.
Delete or turn off the Las Low Point layer with noisy data.
Then create a terrain mesh from both point clouds.
Either run the command RtMeshTerrainCreate
or in the RhinoTerrain menu
select Mesh then Create terrain mesh.
Once the command finishes, check the command line
and accept the result.
Turn off the layers with points clouds
and set each of the viewports’ display mode
to Rendered.
If necessary, zoom to the data with the command
Zoom and the options All viewports and then Extents.
RtImportLas
RtMeshTerrainCreate
If the terrain mesh takes too long to compute,
has too wide an extent, or is too noisy,
then edit the point cloud.
To reduce the size of the point cloud and the resulting mesh,
decimate the point cloud with the command
RtPointCloudDecimate.
To manually remove points from the point cloud
use the command RtPointCloudPointsRemoveByWindow.
Drag a window selection to remove points
from the point cloud and then delete them.
Once the point cloud has been edited,
generate the terrain mesh again with
RtMeshTerrainCreate.

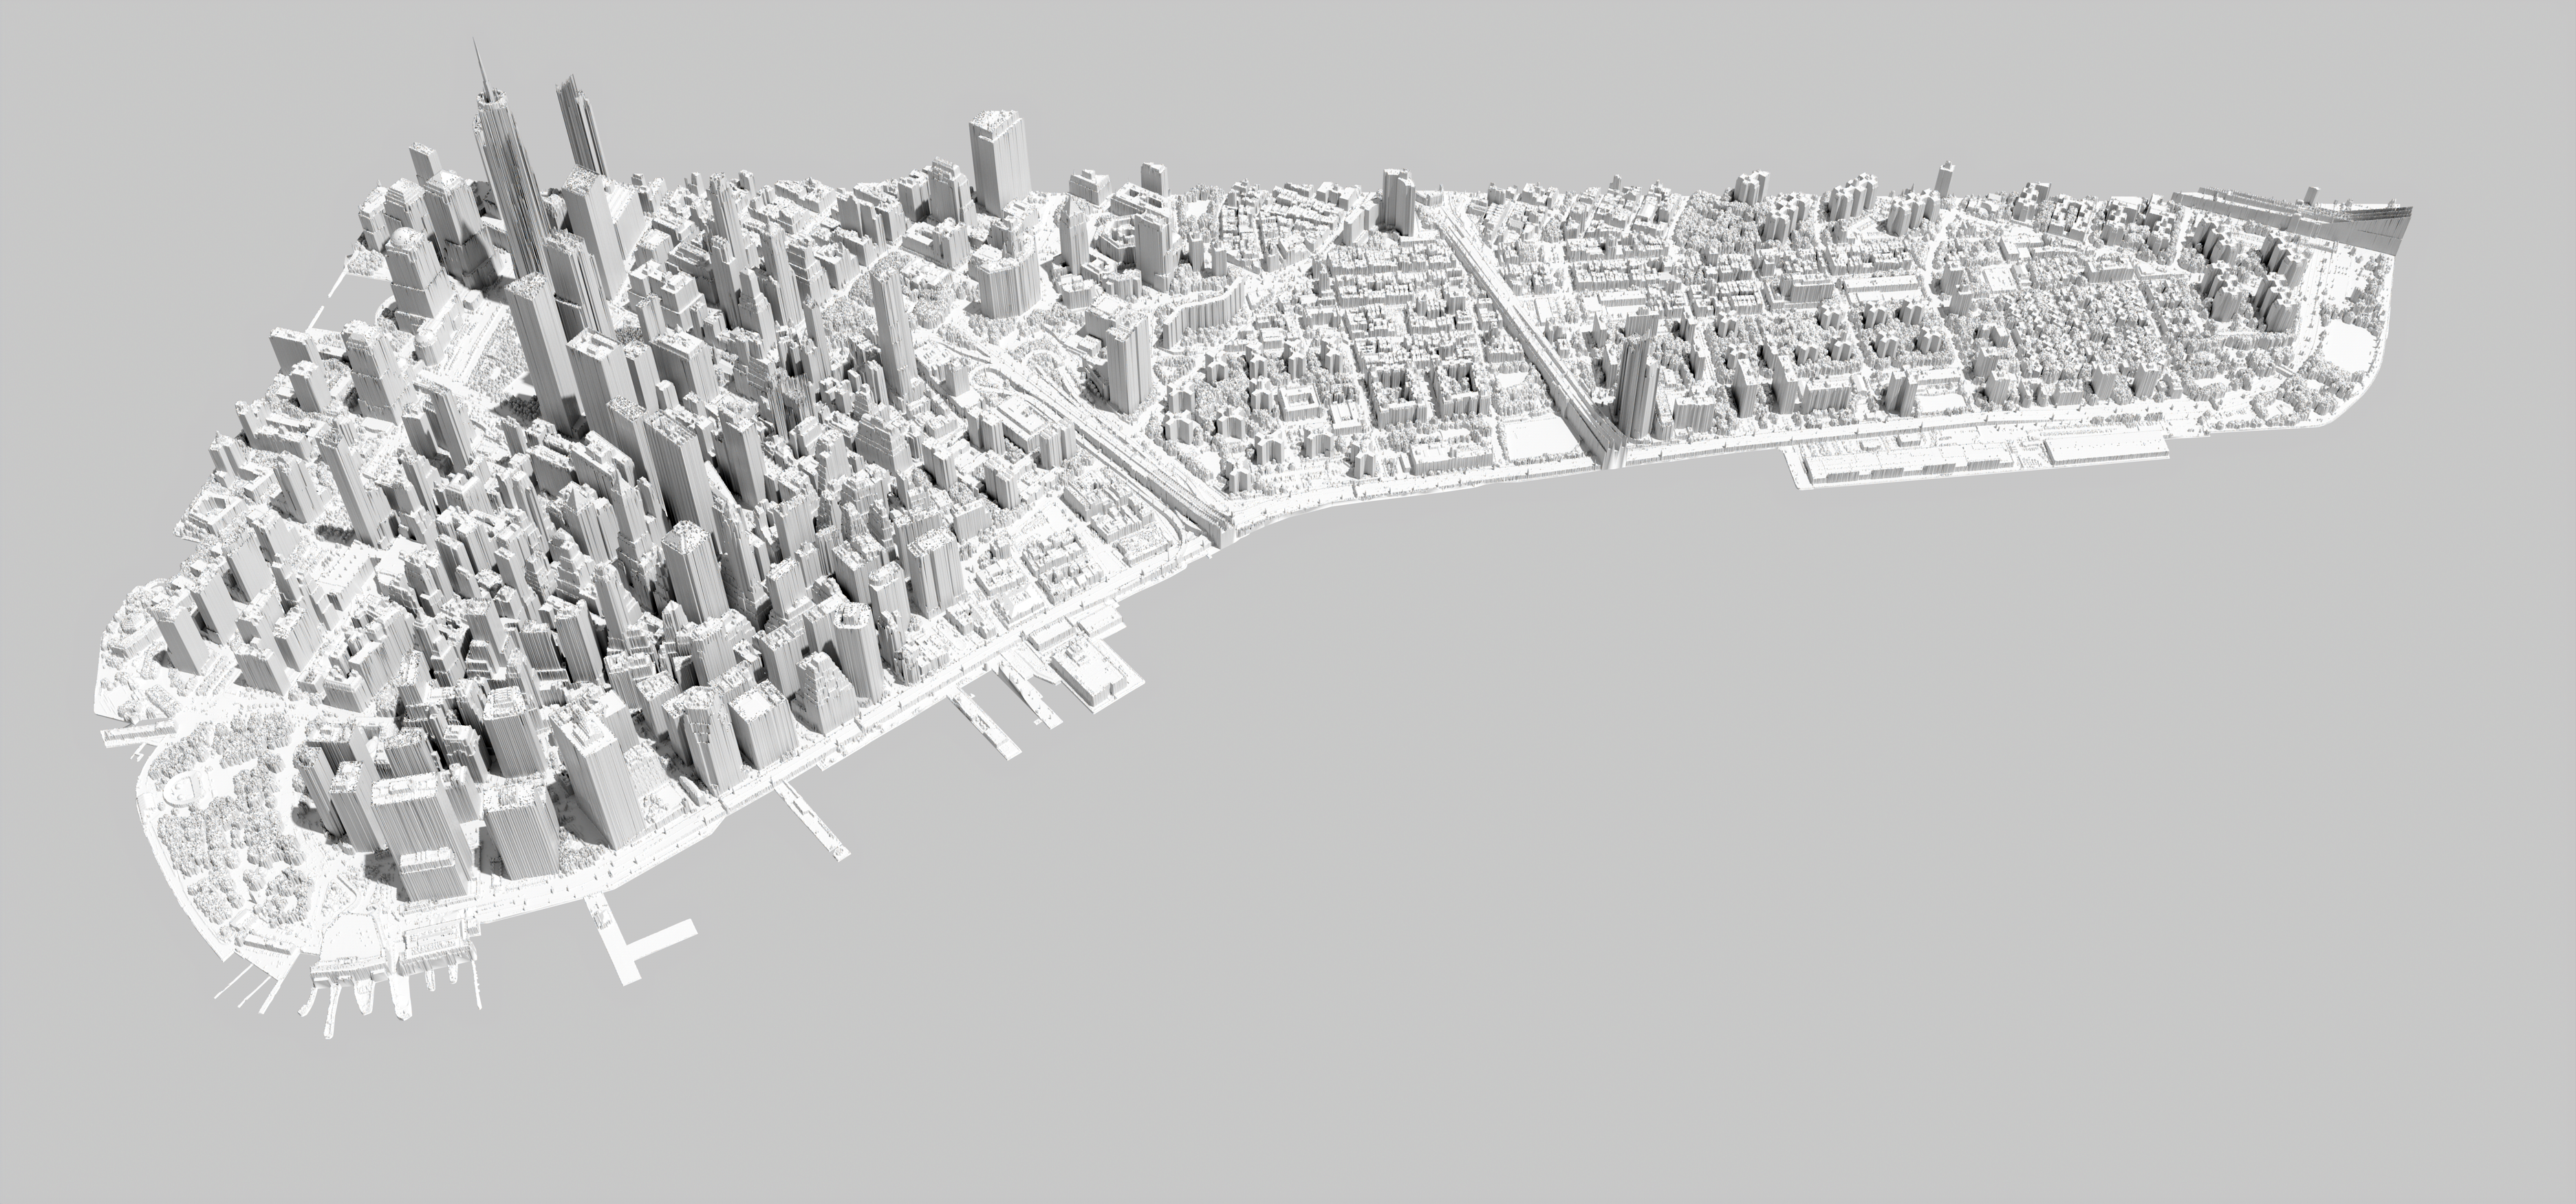
Rasters
Use an elevation raster to generate a terrain mesh for part of Manhattan.
RhinoTerrain can import elevation rasters in the GeoTIFF format.
This is a .tif raster embedded with georeferencing data.
While elevation rasters can be imported directly into RhinoTerrain,
Rhino may run out of memory for rasters larger than about 300 MB
depending on your hardware.
If an elevation raster is too large, then
preprocess the raster in GIS
before importing it into Rhino with RhinoTerrain.
Elevation rasters from the
2017 topobathymetric lidar survey of New York City
– including digital elevation and surface models –
can be downloaded either from
https://orthos.dhses.ny.gov/.
or via file transfer protocol (FTP)
from ftp://ftp.gis.ny.gov/.
Note that FTP support is being disabled or removed
from web browsers like Chome and Firefox
due to security concerns.
Either use a program such as FileZilla,
the command line with curl,
or enable FTP in your browser.
In Chrome go to chrome://flags/
and turn on enable support for FTP URLs.
Download
hh_NYC_020.tif,
the digital surface model
for south Manhattan and Governor’s Island.
Also download and extract the
borough boundaries
shapefiles for New York City
from NYC Open Data.
In the web mapping interface
select Export, Download, and then Original
to download nybb_21a.zip
Use GIS to define and mask the southern tip of Manhattan as the study region.
Start GRASS GIS
and create a new location from georeferenced data.
When creating the new location
read the projection and datum terms
from the digital surface model hh_NYC_020.tif.
First import the digital surface model hh_NYC_020.tif with
r.in.gdal
and then import the borough boundaries shapefile nybb.shp with
v.in.ogr.
Extract Manhattan from the vector map of boroughs
using v.extract
with the SQL statement "BoroName = 'Manhattan'".
Then set the region to the digital surface model with
g.region
and then create a vector area from the region with
v.in.region.
Find the intersection between
the extracted borough and the vector region using
v.overlay
with the and operator.
Remove the columns a_Shape_Leng and a_Shape_Area
from the database of the resulting vector map with
v.db.dropcolumn
as these may cause the map not export properly.
Set the region and mask to this vector map
with
g.region
and
r.mask.
Then export the vector map with
v.out.ogr
and the masked raster map with
r.out.gdal.
If the raster is still too large to process with RhinoTerrain,
then use g.region
to change the raster resolution from 1 x 1 foot cells to 2 x 2 foot cells
with g.region res=2 and export again.
r.in.gdal input=hh_NYC_020.tif output=surface_2017
v.in.ogr input=nybb.shp output=boroughs
v.extract input=boroughs where="BoroName = 'Manhattan'" output=manhattan
g.region raster=surface_2017
v.in.region output=region
v.overlay ainput=manhattan binput=region operator=and output=manhattan_region
v.extract --overwrite input=manhattan_region cats=1 output=manhattan
v.db.dropcolumn map=manhattan columns=a_Shape_Leng,a_Shape_Area
g.remove -f type=vector name=region,manhattan_region
g.region vector=manhattan res=1
r.mask vector=manhattan
v.out.ogr input=manhattan output=manhattan.shp format=ESRI_Shapefile
r.out.gdal input=surface_2017 output=manhattan.tif format=GTiff
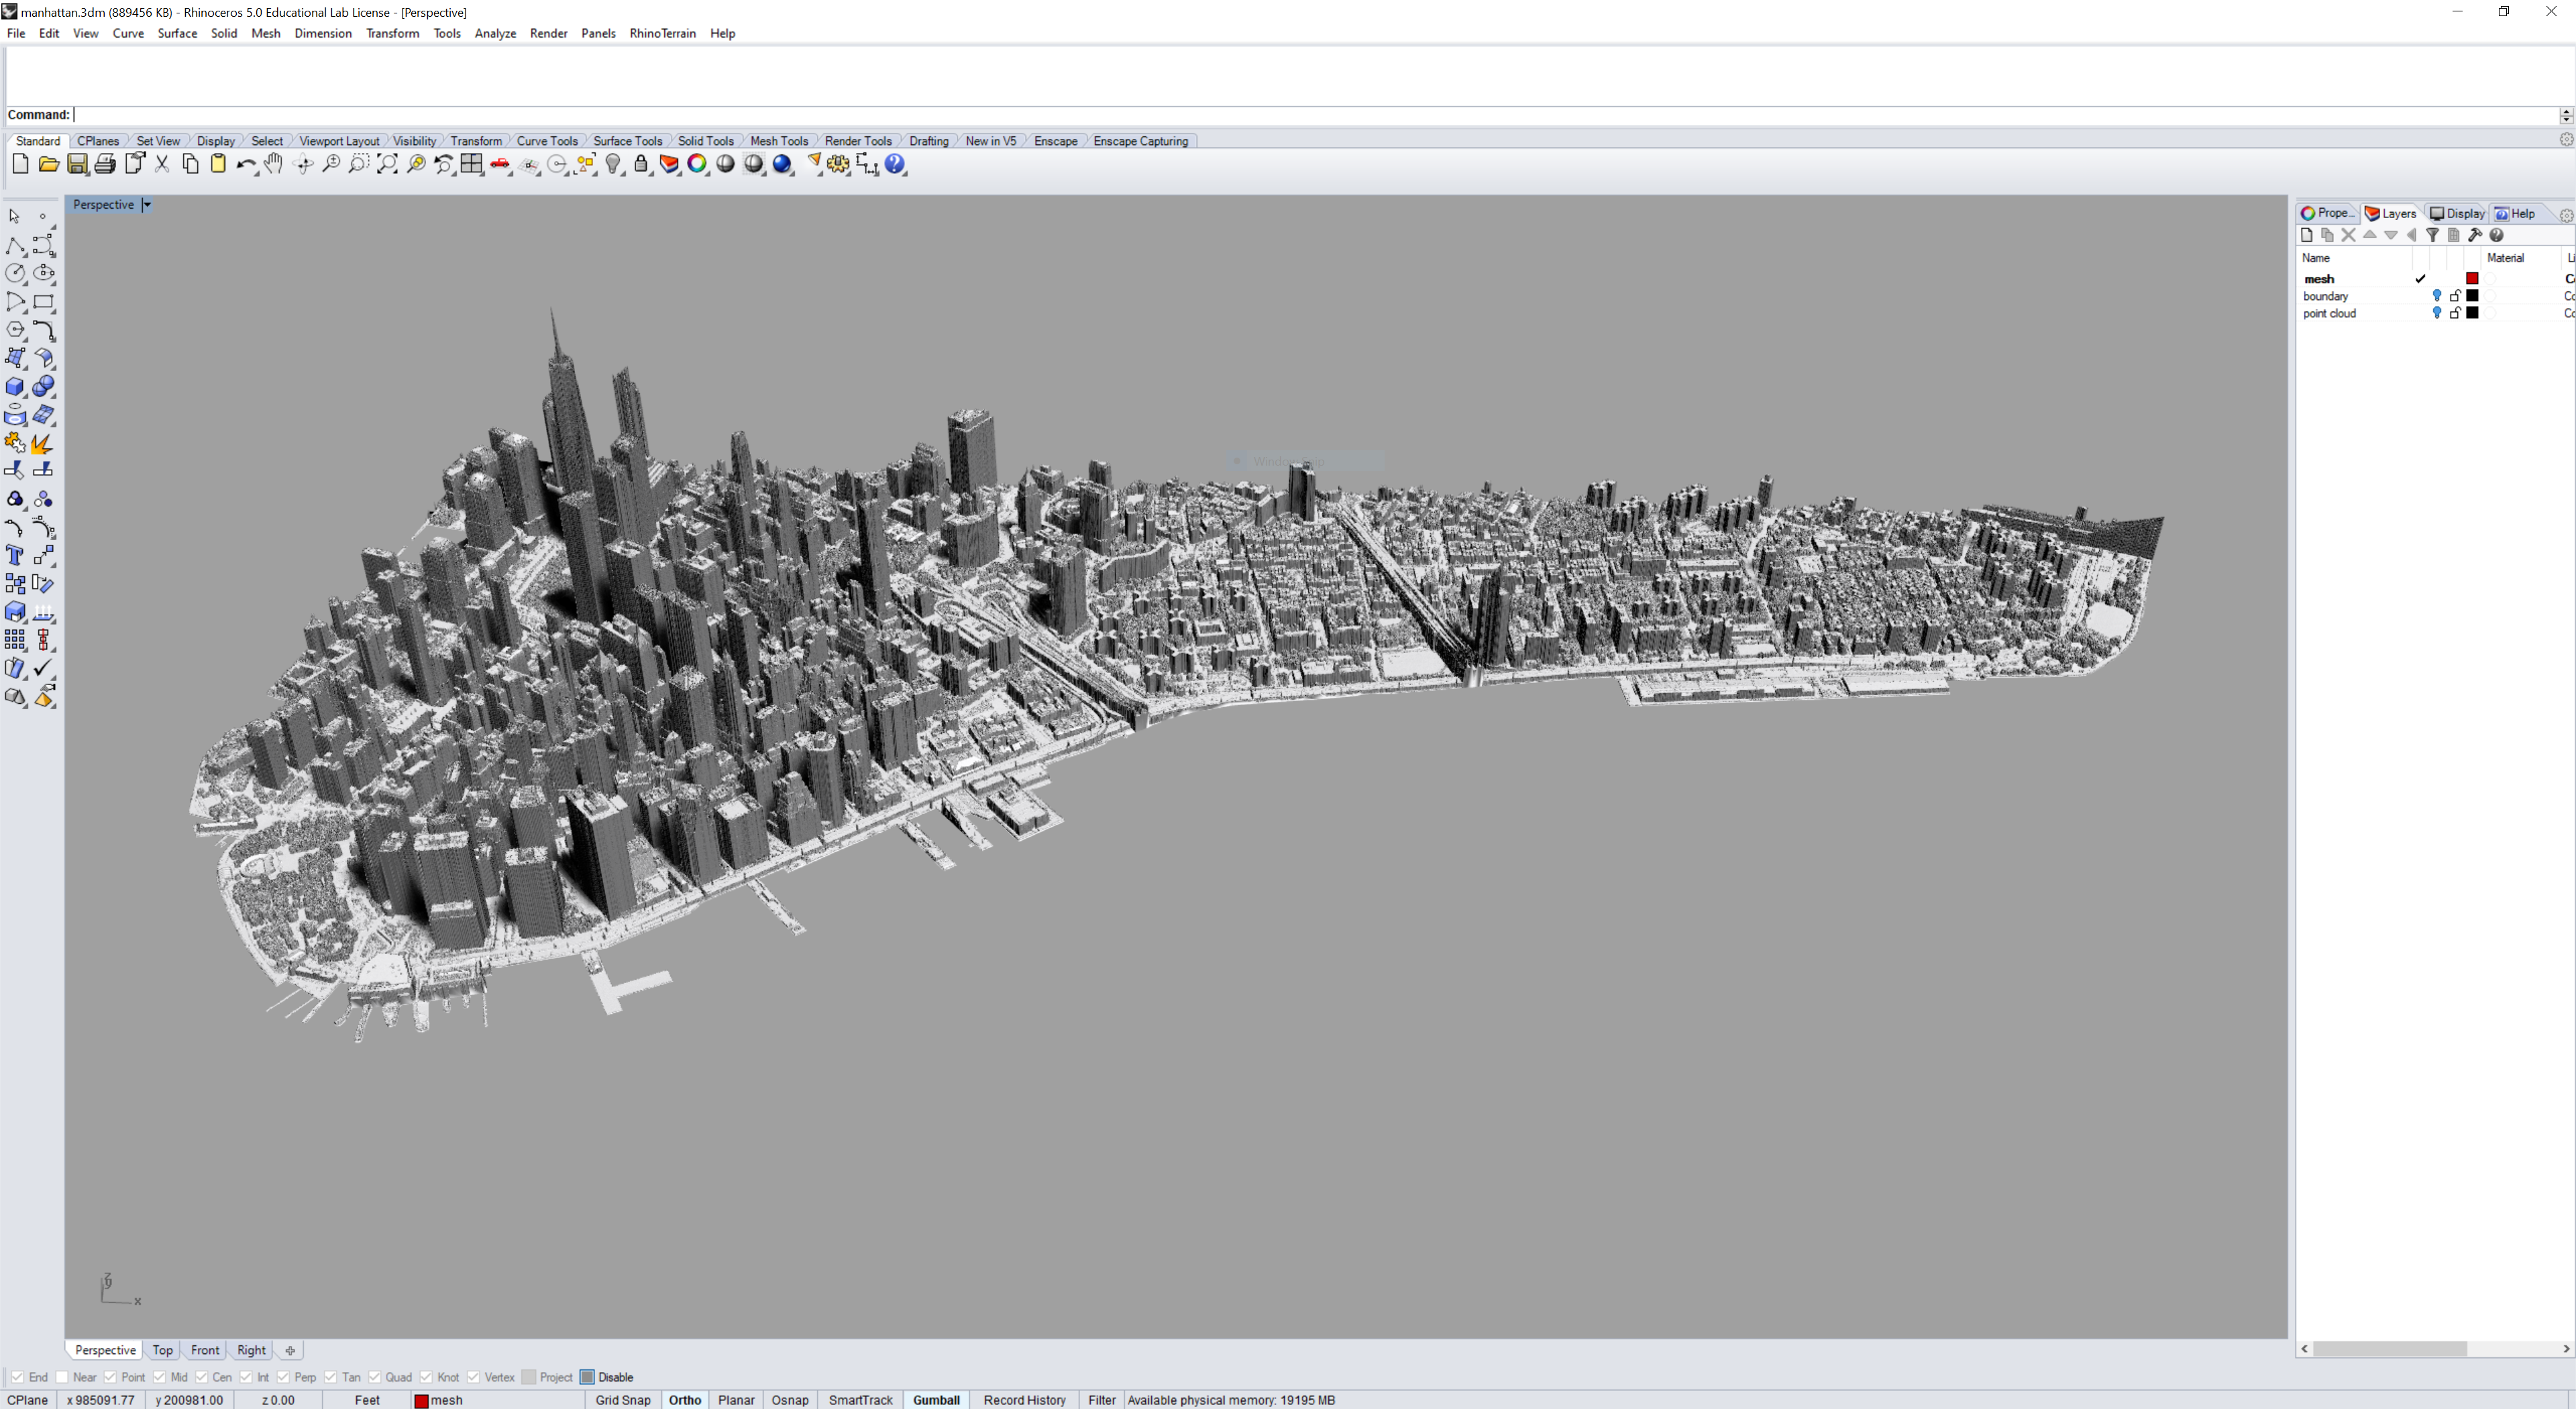
Start Rhino with the RhinoTerrain plugin.
To import the digital surface model of Manhattan as a point cloud
either run RtImportElevation in the command line or
in the RhinoTerrain menu
under Import / Export
select Import elevation raster.
Then import the vector area
either by running RtImportVector in the command line
or by selecting Import Shapefile vector
in the RhinoTerrain menu
under Import / Export.
Then use the command RtMeshTerrainCreate
to generate a mesh from the point cloud
using the vector area as a boundary.
In the command line parameters
set the boundary style to user defined
and select the vector area,
set input to Delete,
and then click Accept.
Set the viewport mode to
Rendered or Artic
to better visualize the mesh.
RtImportElevation
RtImportVector
RtMeshTerrainCreate
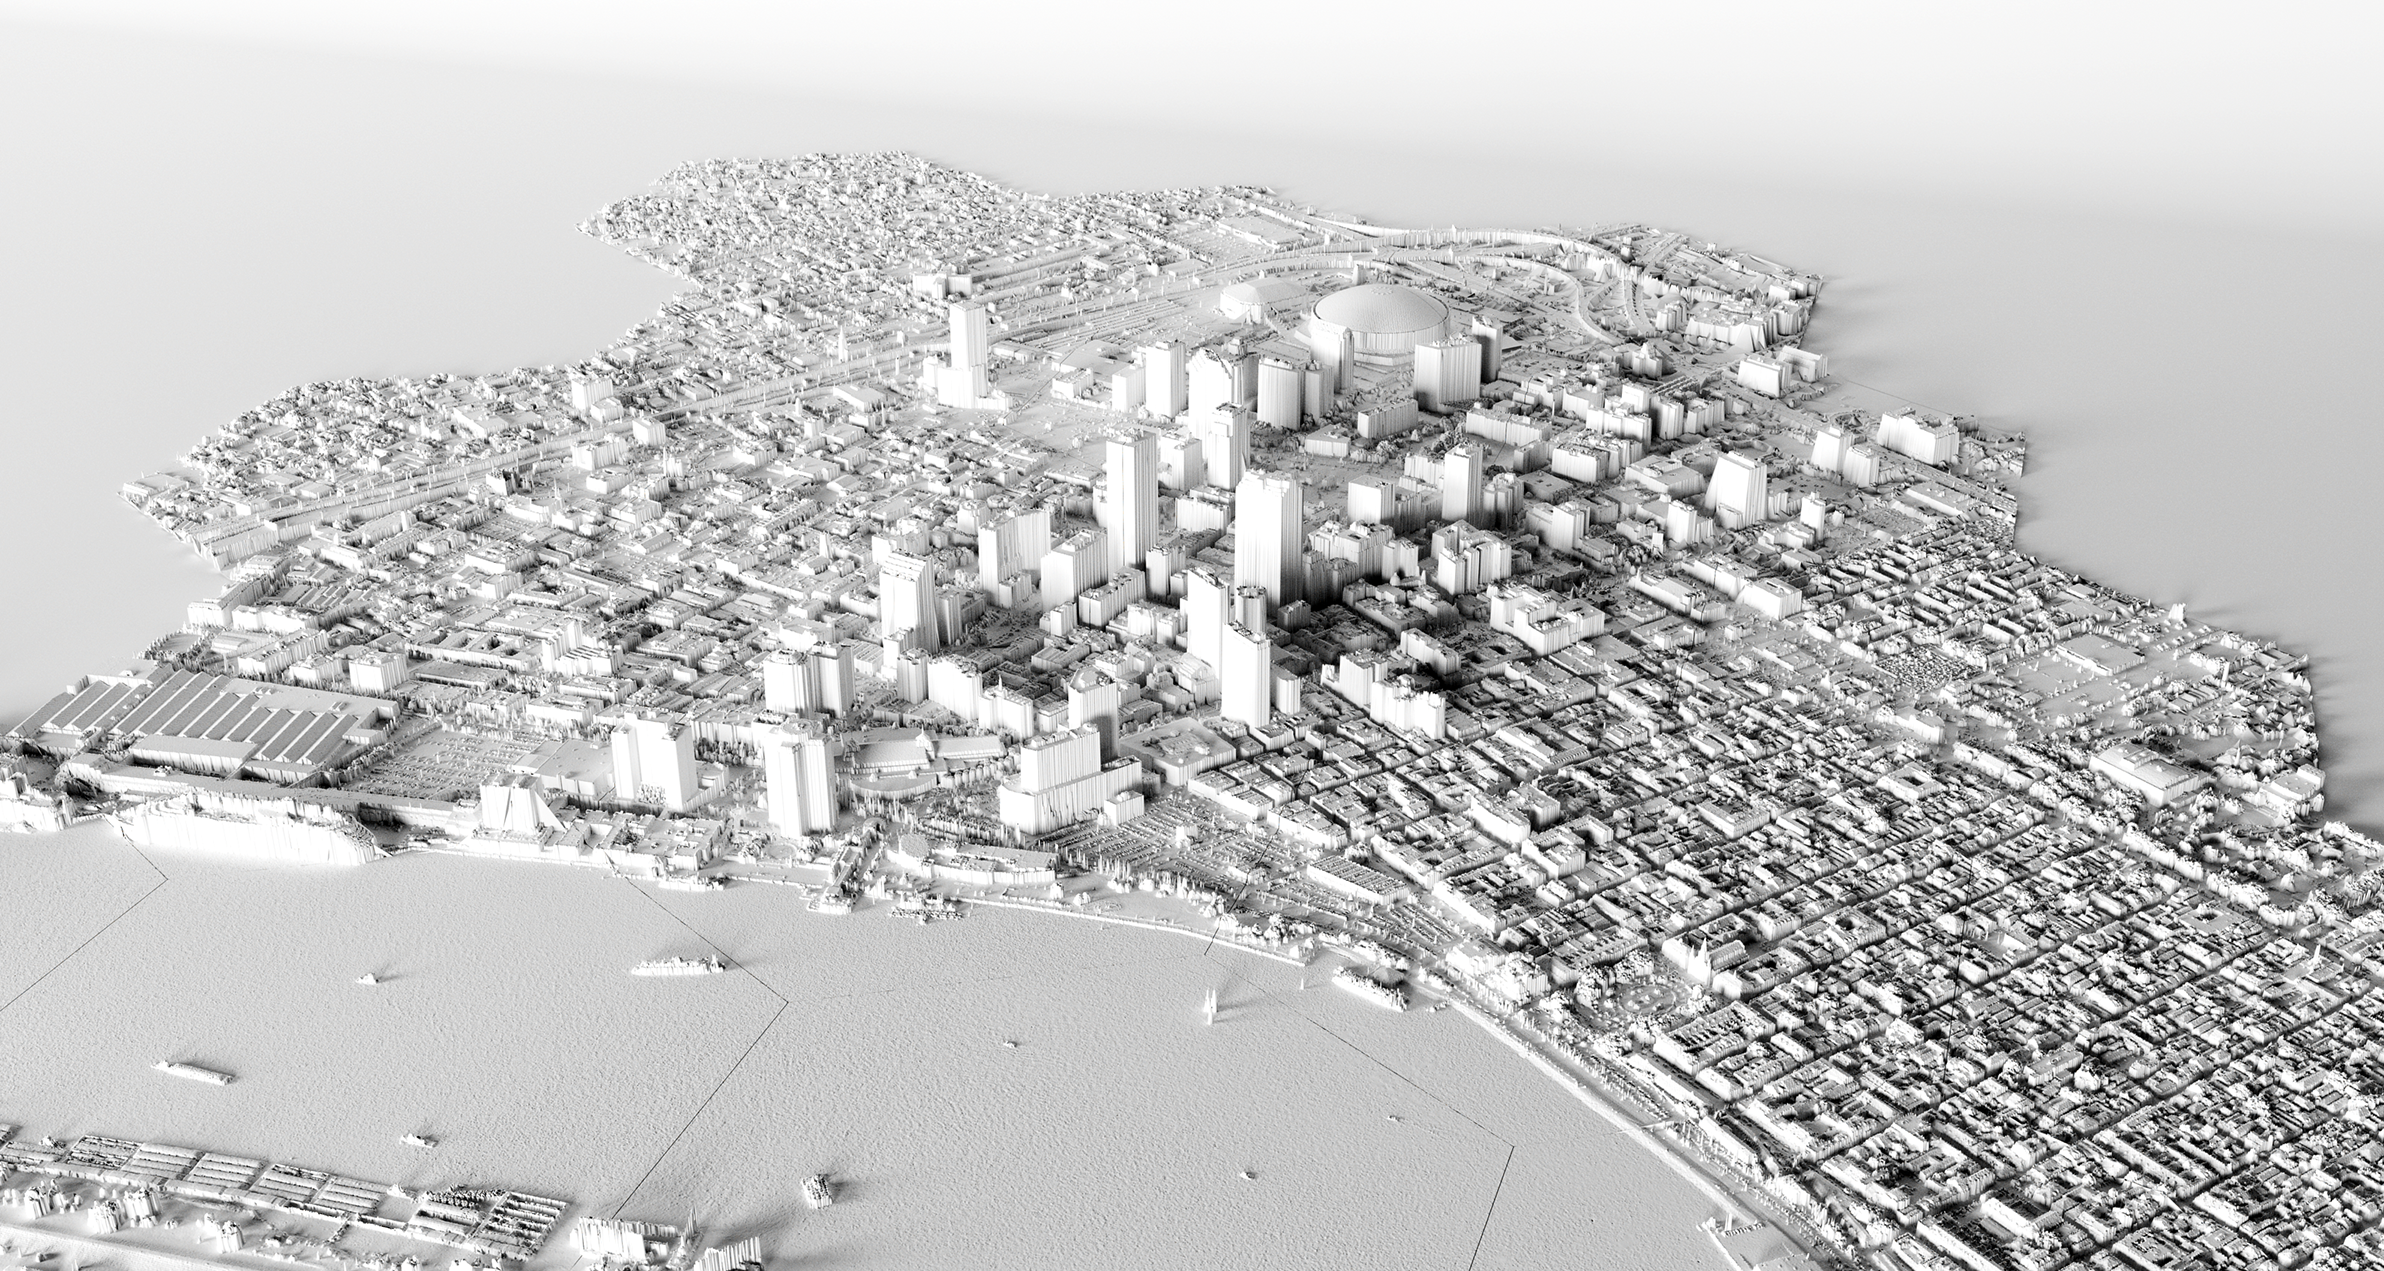
3D Rendering
Use a render engine to generate better visualizations of the terrain model. Render engines with plugins for Rhino include Thea Render, Vray, Maxwell, OctaneRender, and Enscape. Render engines with bridges to Rhino include Maverick Studio, Keyshot, and Lumion. This tutorial will use the Thea for Rhino plugin to render the model of Manhattan. Thea Render has real-time and production render modes that use the CPU and GPU simultaneously.
Start Rhino.
From the Thea Render menu
open the Render Settings panel.
In the Render Settings tab
turn on ambient occlusion
and under devices select the
CPU and GPUs to use for rendering.
In the Environment tab
turn on soft shadows
and enable uniform illumination.
Maximize the perspective viewport and
then in the Camera tab
sync with the Rhino viewport.
First adjust the lighting using
Presto in interactive mode in the viewport.
In the Thea Render toolbar
select start interactive rendering in viewport.
For lighting run the command
Sun
in Rhino’s command line
and adjust the settings.
When satisfied with the lighting
stop the interactive rendering in the viewport.
Open Thea Darkroom,
set the render engine to Presto
and the mode to Presentation Render,
and start rendering.
When it finishes adjust the display settings.
In Thea Darkroom’s Display Settings panel
set tone mapping to filmic,
shadows to 36,
sharpness to 50,
burn to 5,
chroma to 50,
and enable denoising.
Save the rendering as a
.png portable networks graphic file.
Edit the image in Photoshop.
In the Image menu
under Adjustments
select Levels.
On the input levels slider
move the black point from 0 to 85
to increase the tonal range in the image.
Save.