Parametric Bench
Modeling a parametric bench in Grasshopper
Contents
Parametric Bench
When form is generated by an algorithm, variations in form can be explored by changing the input parameters of the algorithm. This tutorial covers modeling a simple parametric bench from two curves. The shape of the bench can be morphed by changing its parameters - i.e. the coordinates of control points, the width of the bench, the thickness of the bench, and the height of the bench. Download the Grasshopper definition for this tutorial. Watch the video tutorial at .
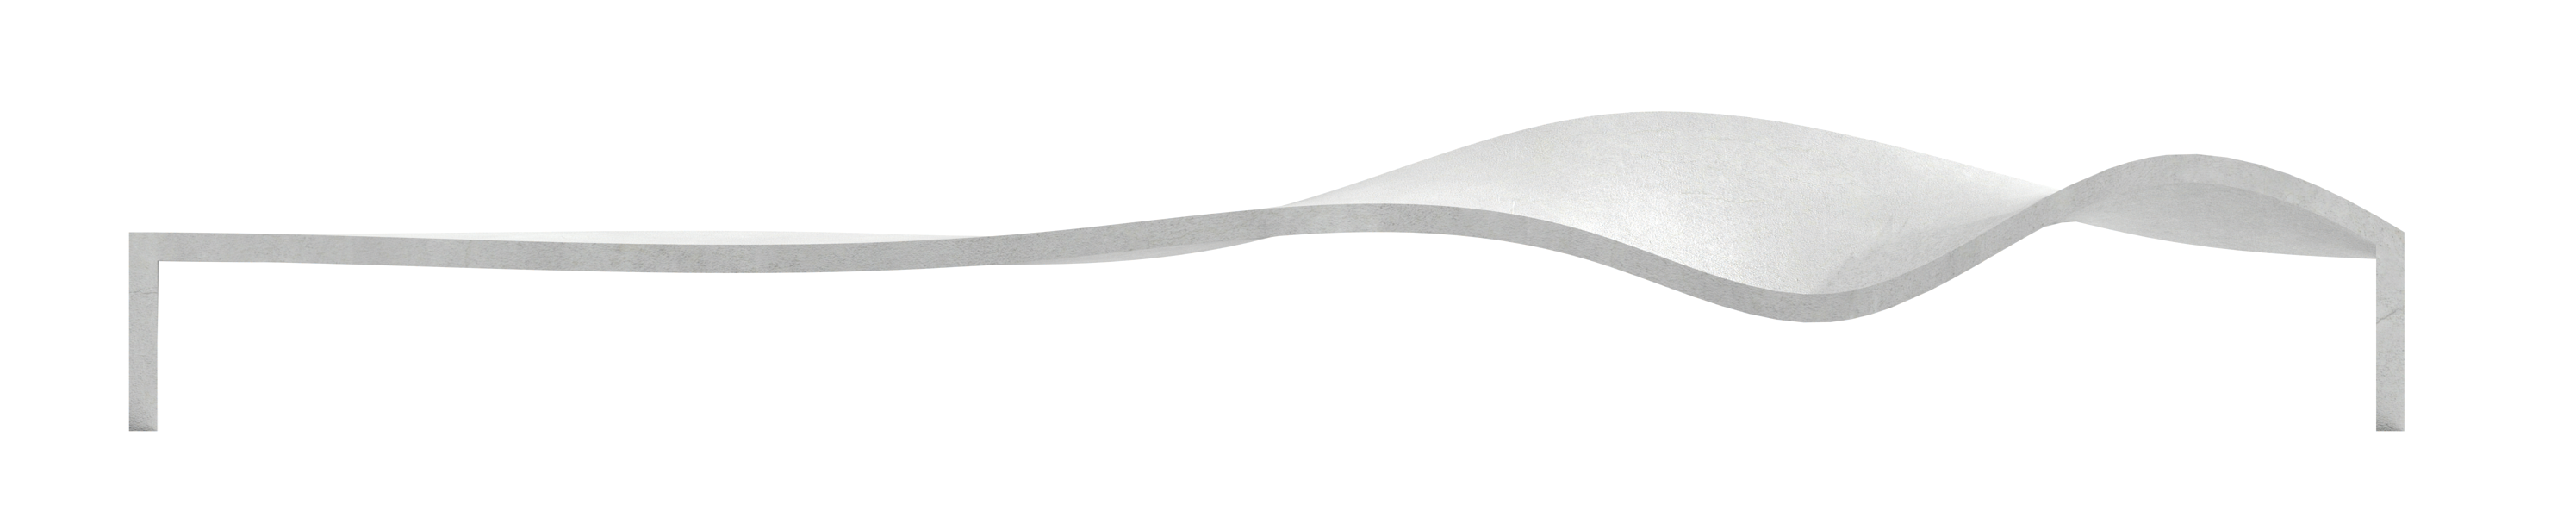
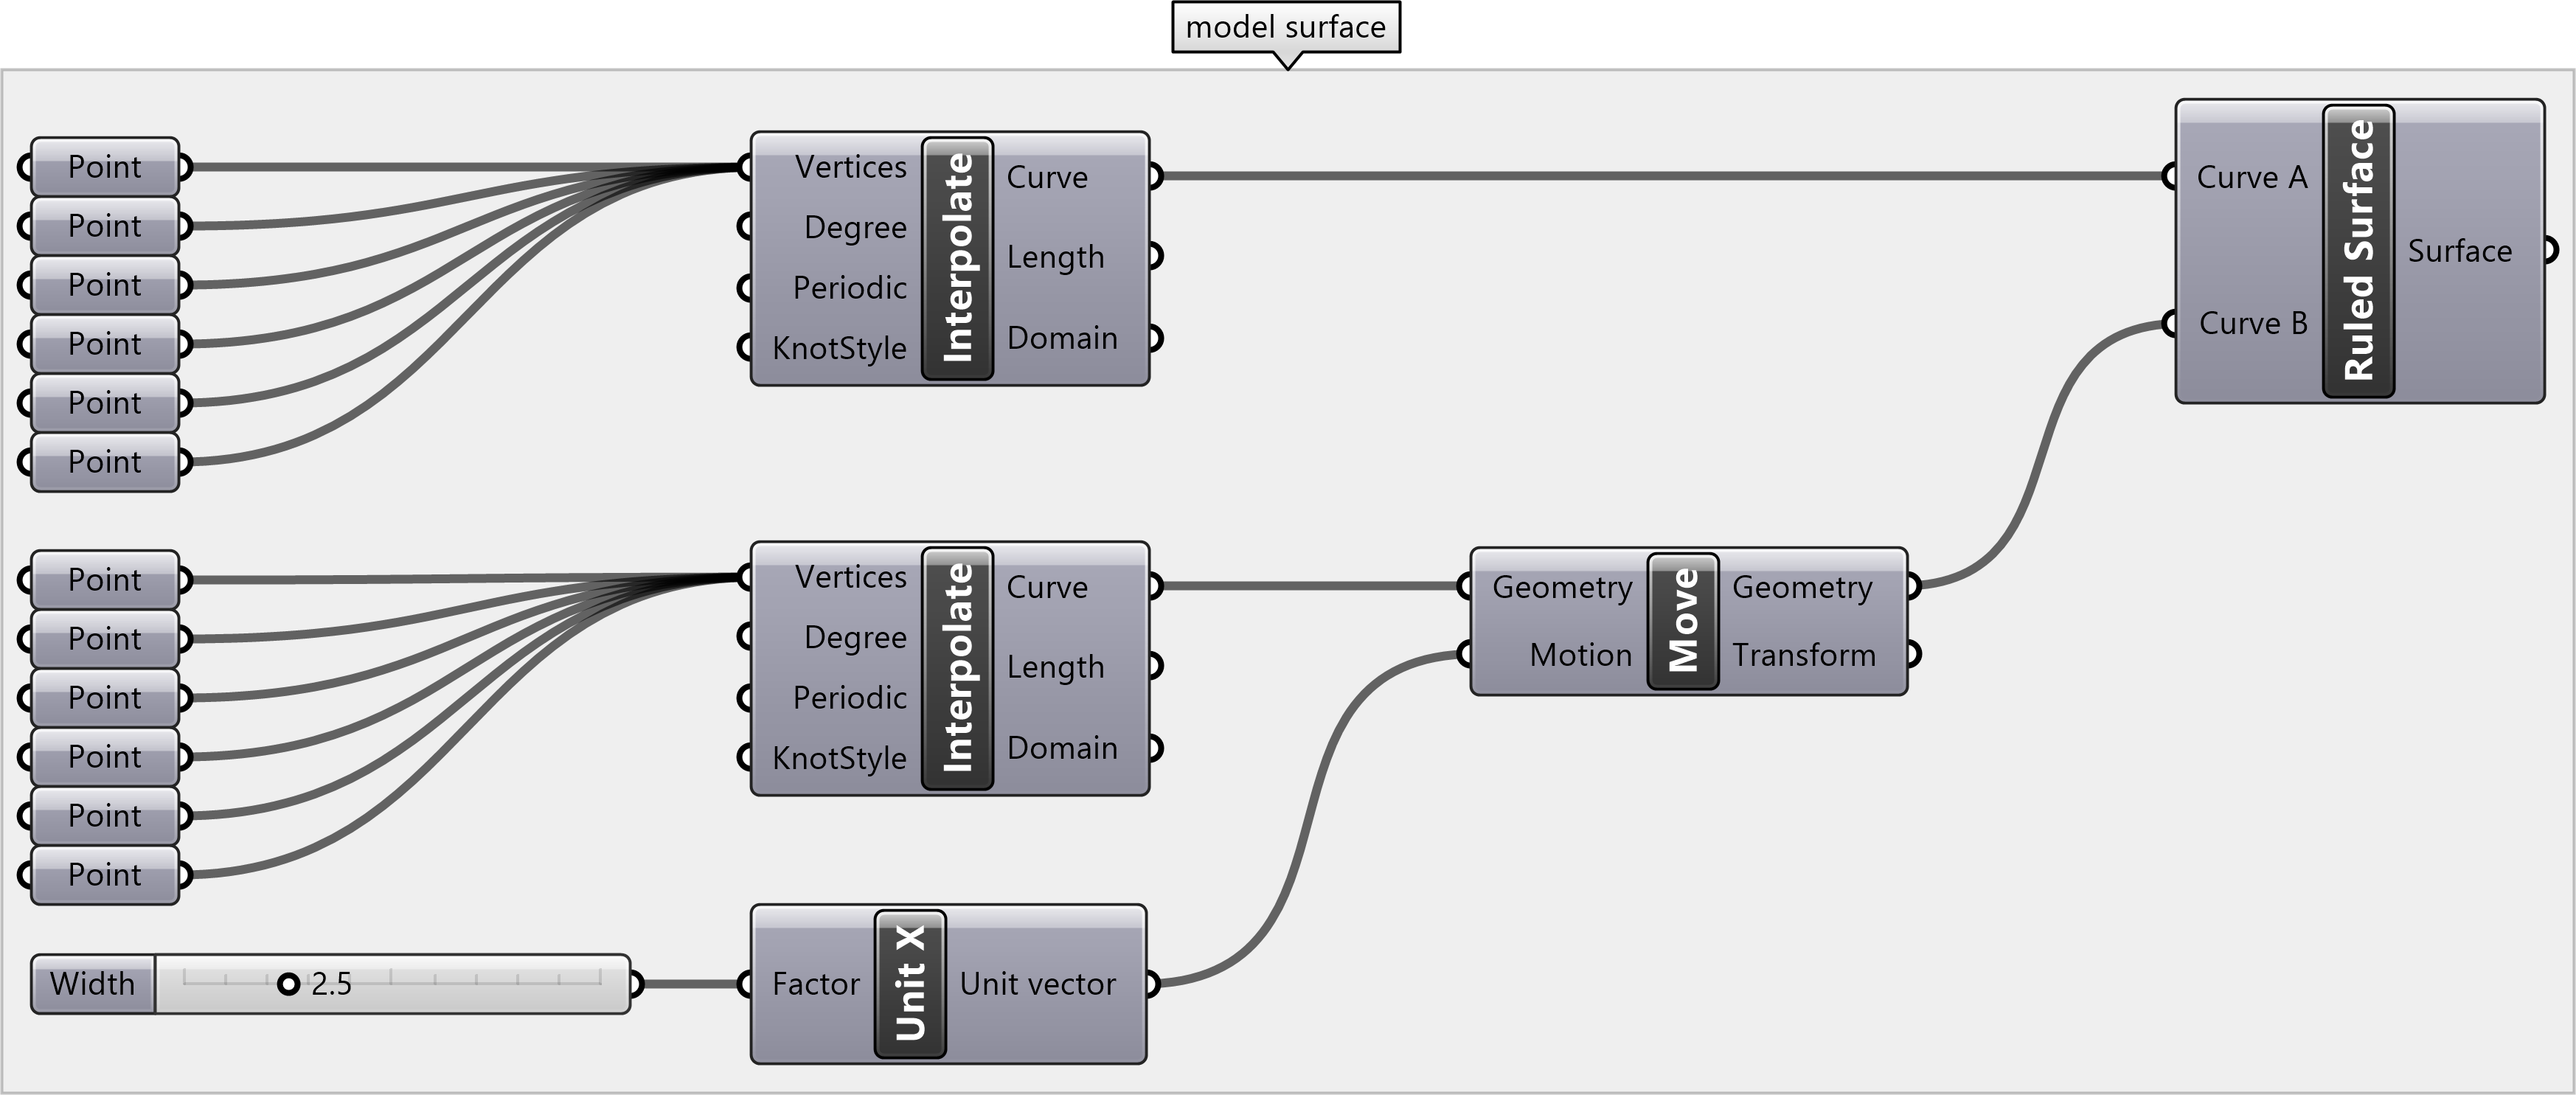
Surface
First create two sets of points.
Each set of points will be interpolated as a curve.
Create the points by placing point parameters
and setting their coordinates in Rhino.
Place the points for both curves along the y-axis.
The start points of each curve should have the same coordinates
and the end points should have the same coordinates.
Interpolate
two curves through these two sets of points.
Set the width of bench by using the
move
component to translate the second curve along the x-axis.
Create either a
ruled surface
or a loft
from the two curves.
In the Display menu, turn on the Gumball.
Now when the point parameters are selected in Grasshopper,
a gumball will appear in Rhino.
Use the gumballs to move the points and morph the surface.
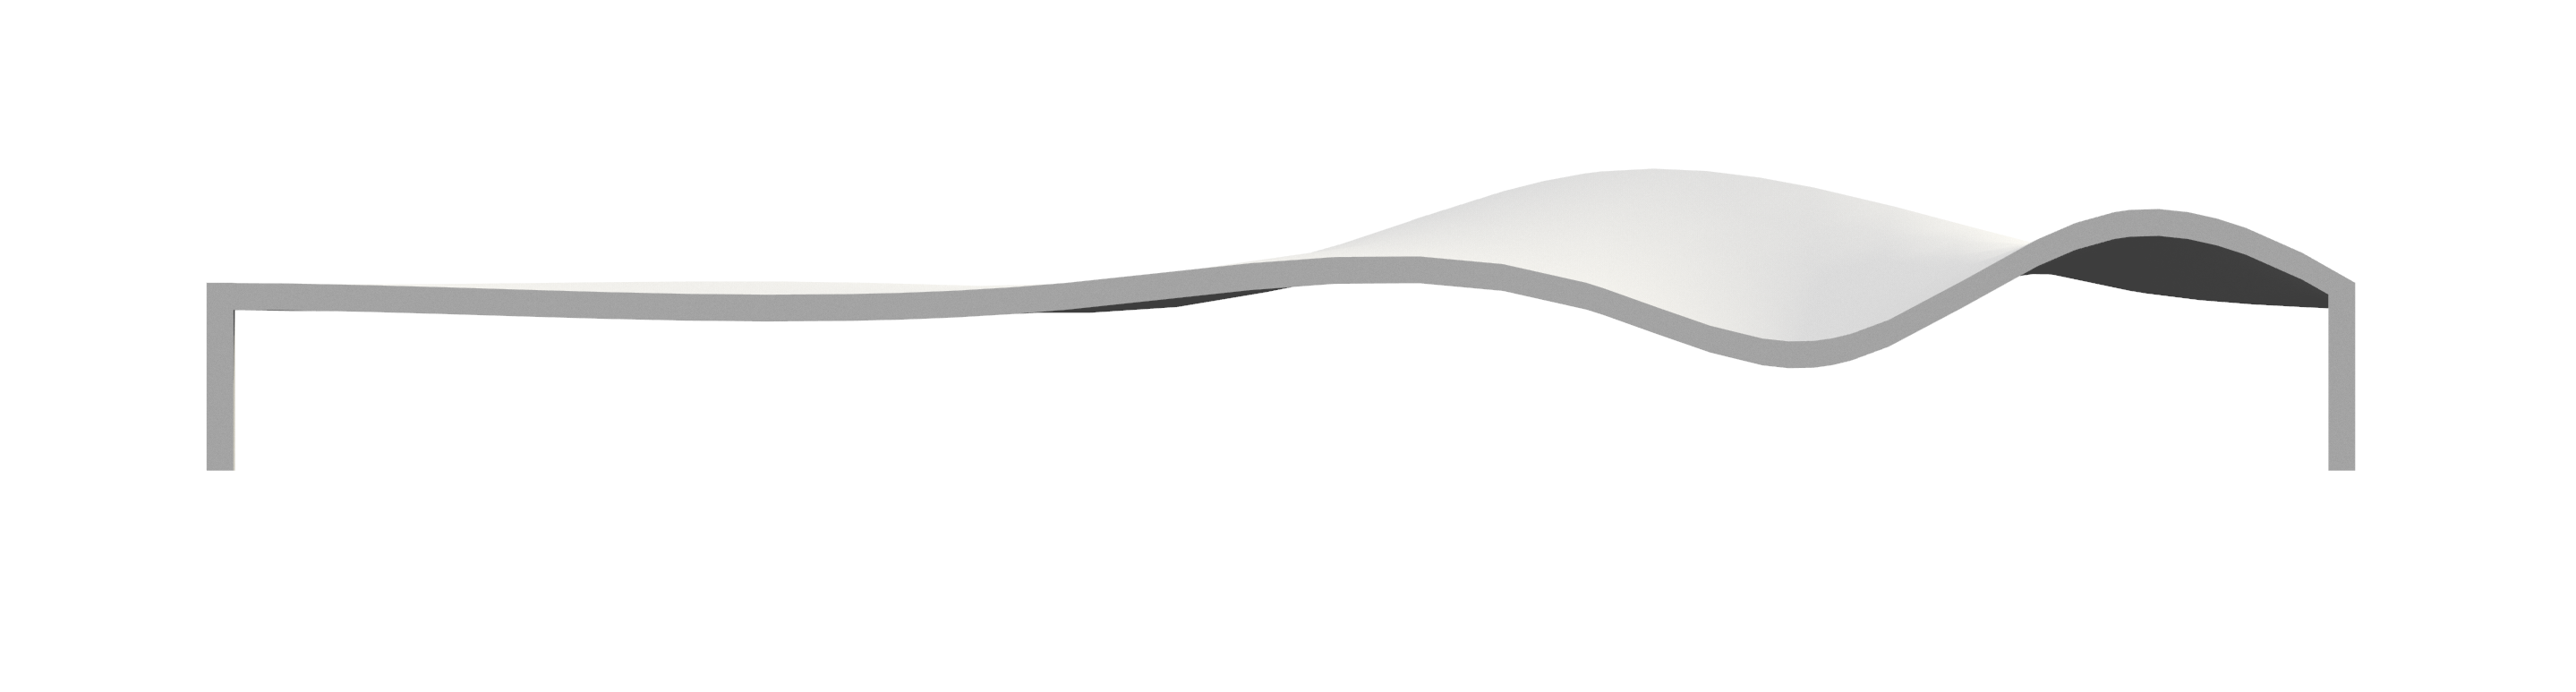
Try to create areas with different ergonomics such as
a long flat stretch or a concave area.
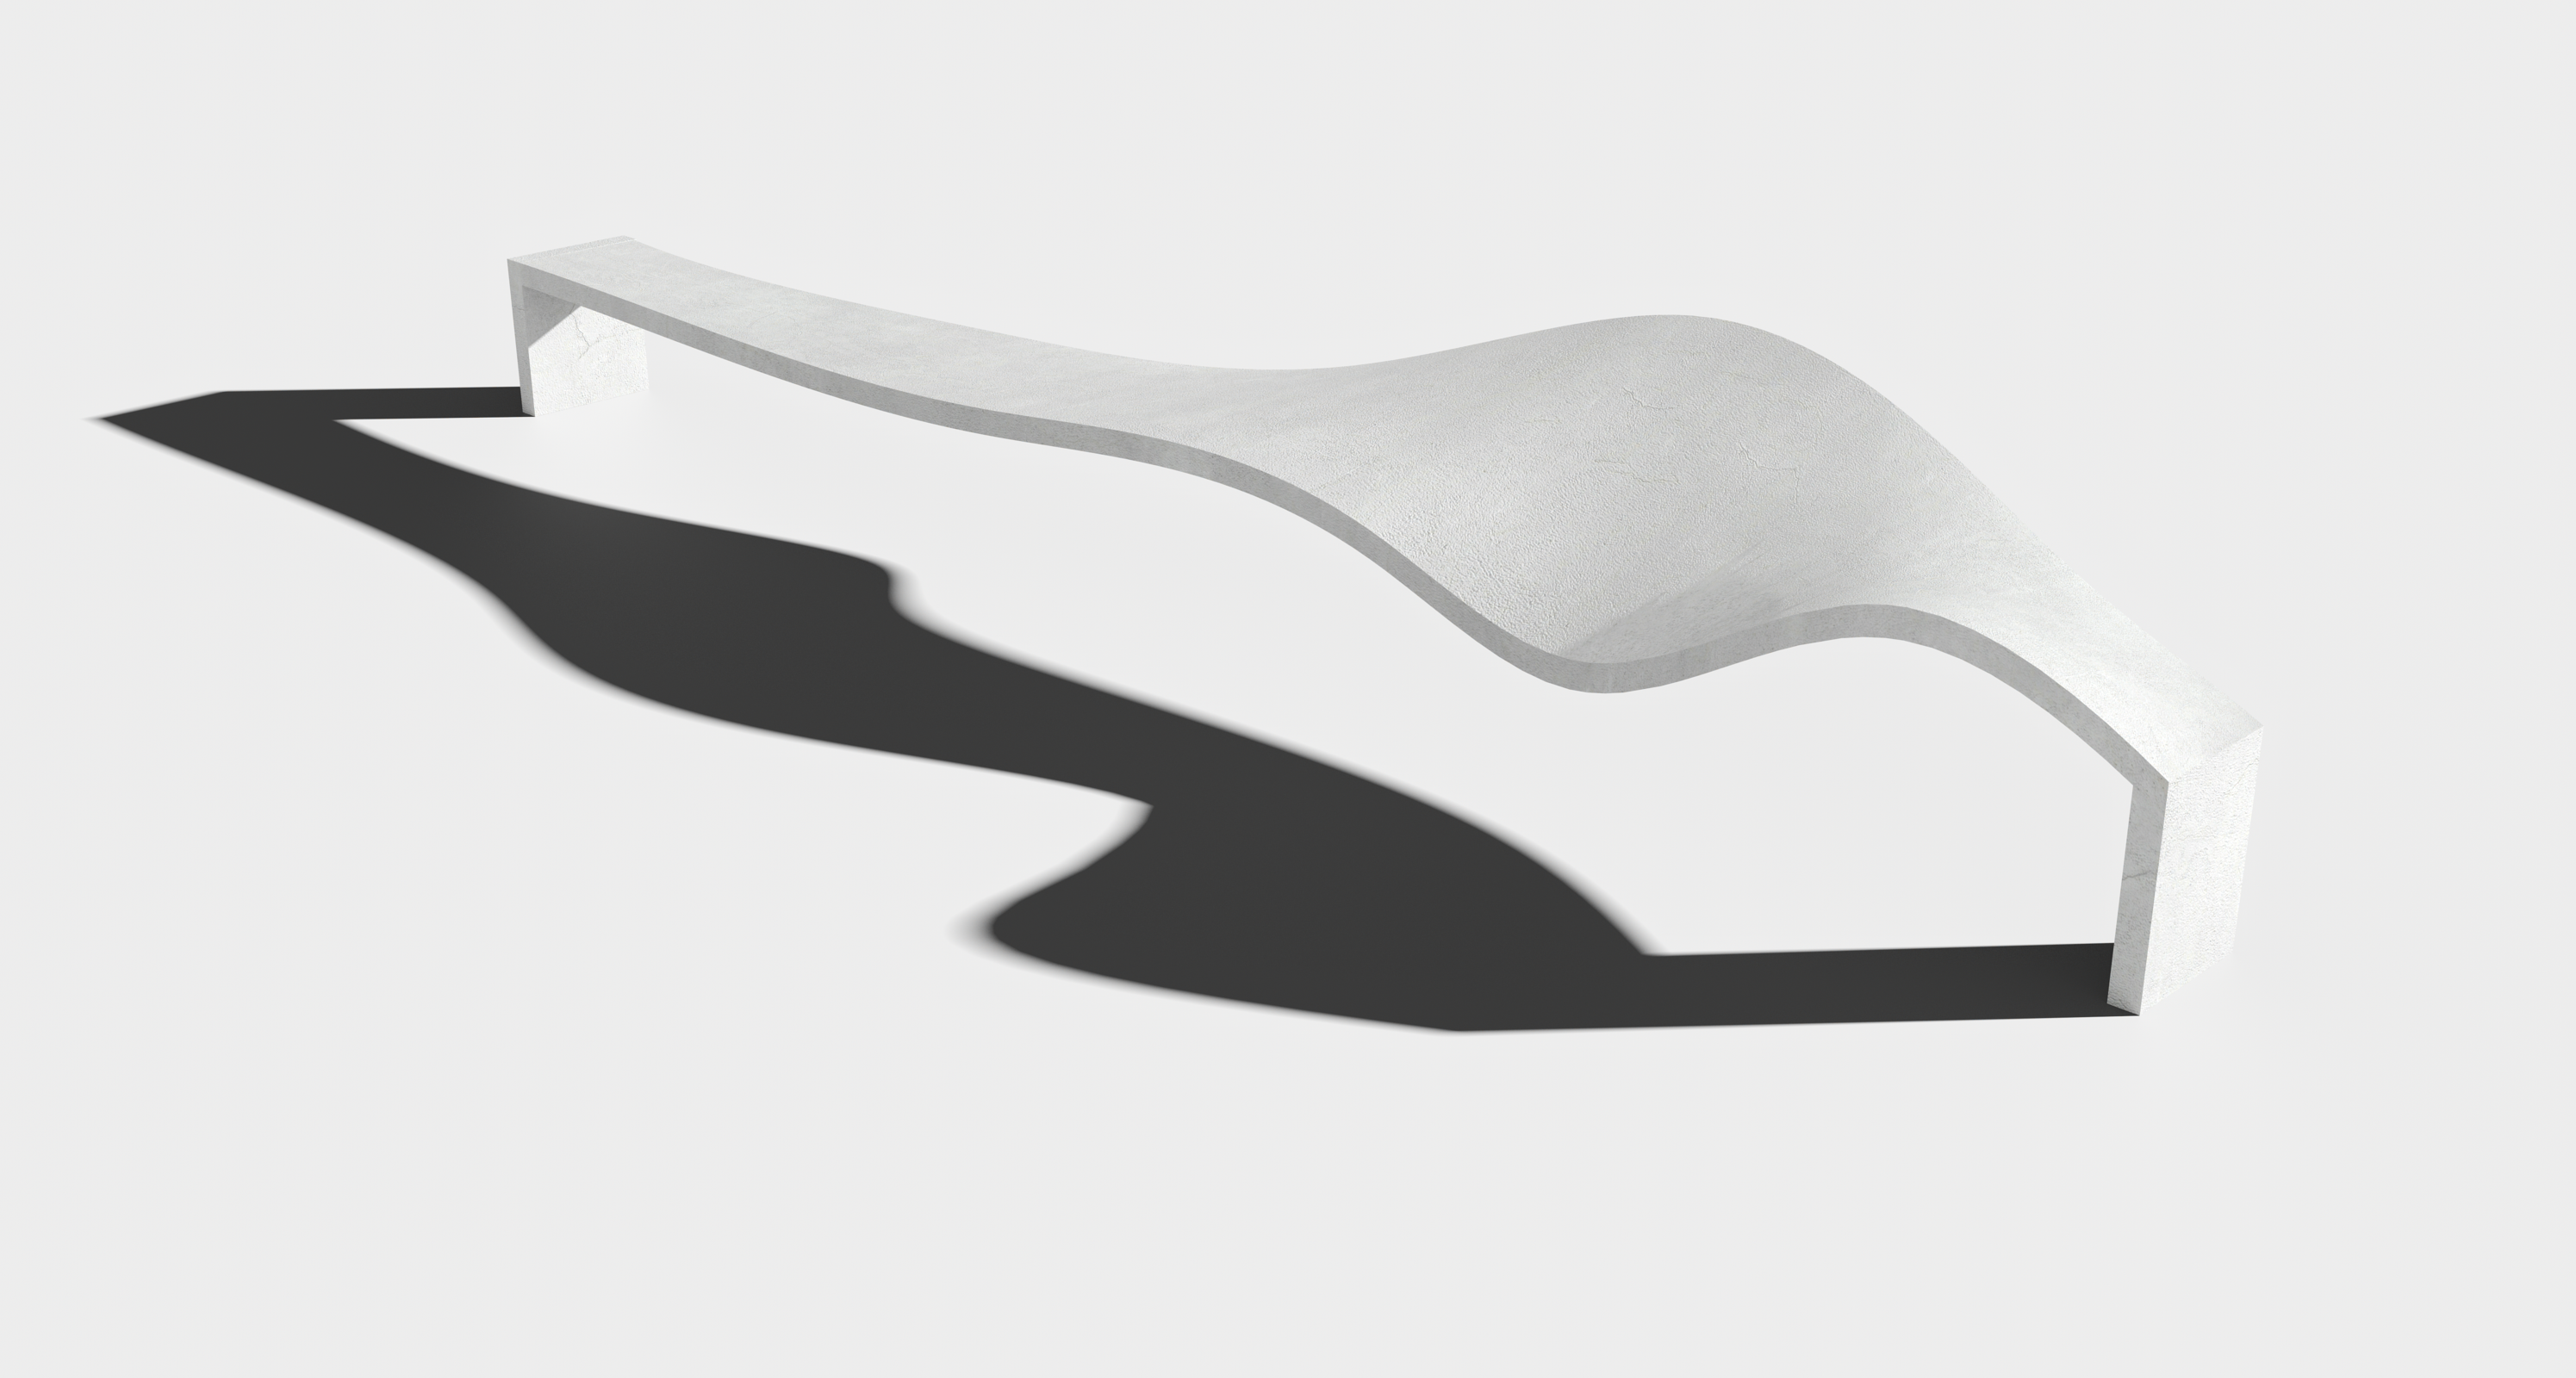
Extrusion
Next model the seat of the bench from this surface. Move the surface of the bench on the z-axis to the desired height for sitting. Then extrude the surface of the bench down on the z-axis to give it a thickness. The bench now has width, height, and thickness parameters.

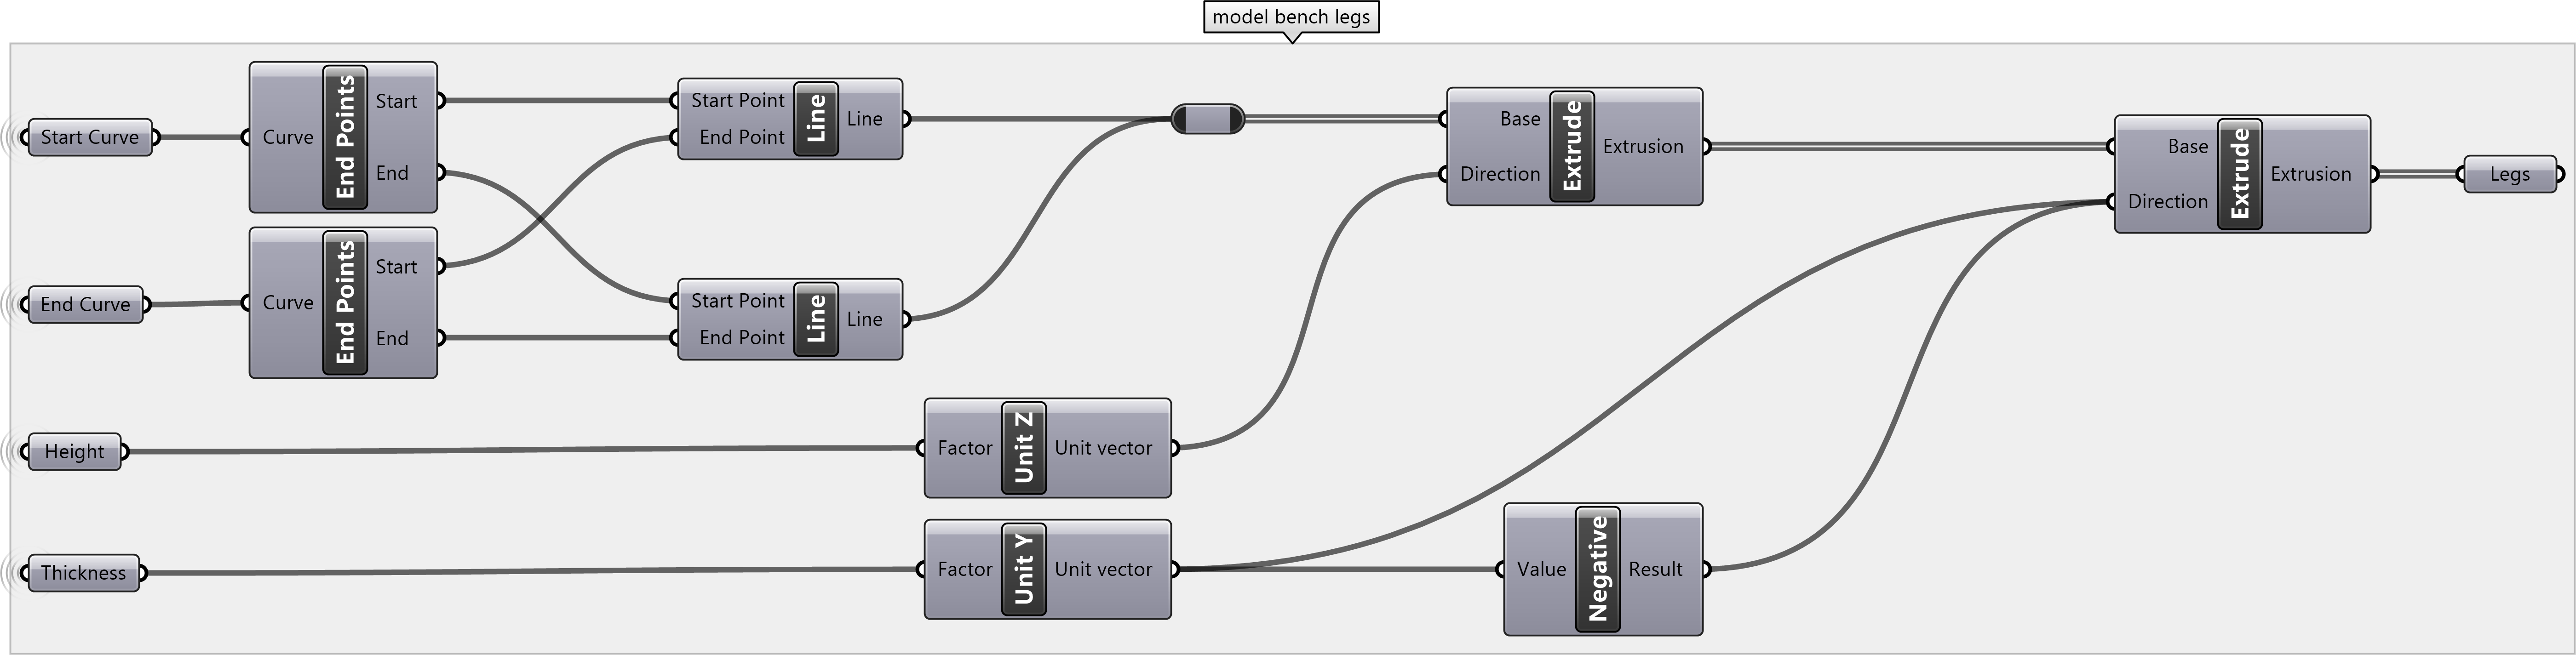
Legs
Model legs for the bench based on the start and end points of the curves and on the thickness and height of the bench. First find the end points of the curves that define the shape of bench. Then use the Line component to construct a line between the start points of the curves and another line between the end points of the curves. Extrude these lines upwards on the z-axis by the height parameter to form the outer face of the legs. Then extrude the resulting surfaces inwards on the y-axis to give the legs a thickness. Connect the unit y vector to the extrude component to move extrude the first leg along the y-axis. Then connect the unit y vector to the a negative component and connect that to the extrude component to reverse the direction of extrusion for the second leg of the bench.
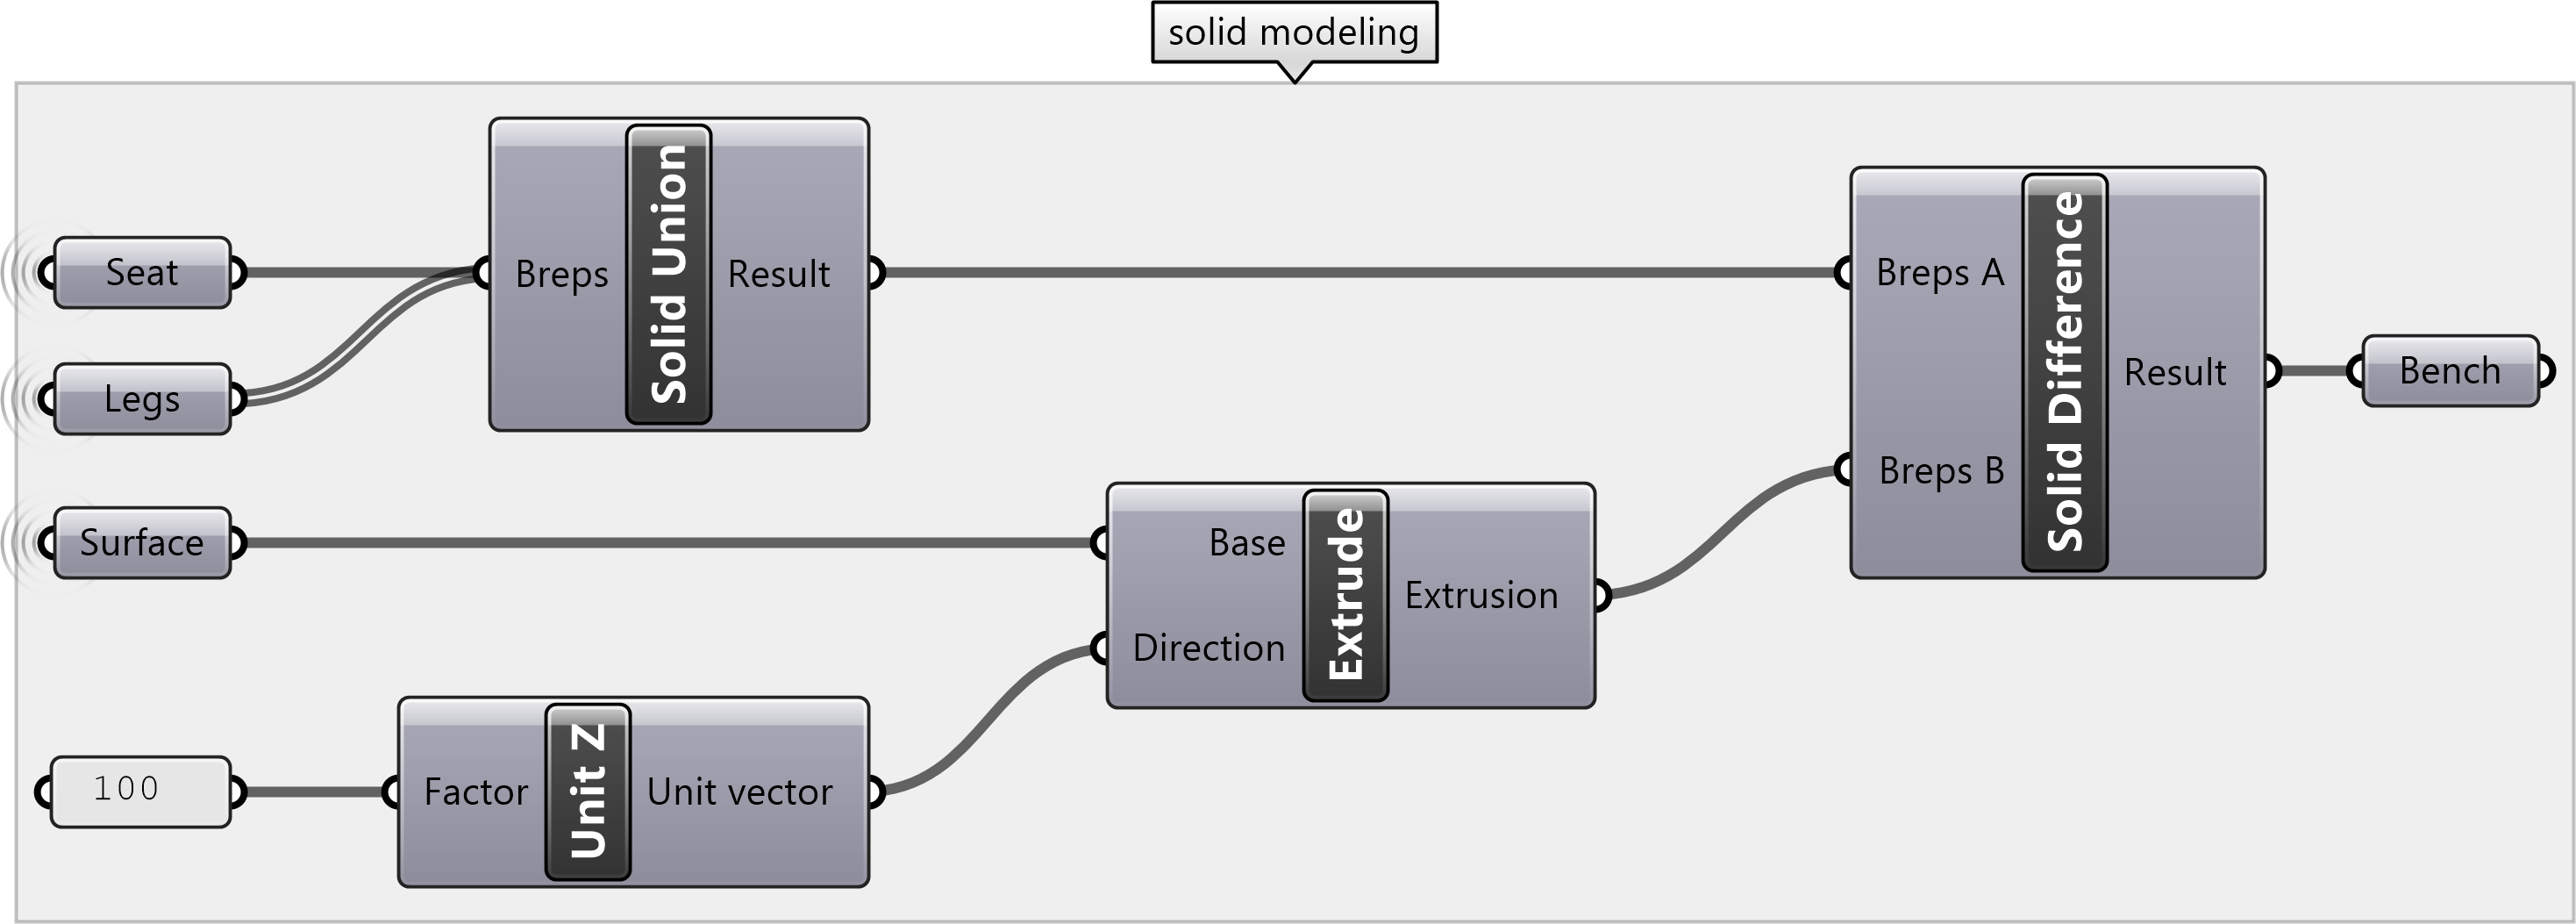
Solid Modeling
Use Boolean modeling operations to make a seamless solid model of the bench. A Boolean union adds geometry together to form a merged solid volume. First add the legs to the seat of the bench with a solid union. Inspect the corners of the bench where the legs and the seat meet. Depending of the curvature of the seat, the top of the legs may stick through the seat of the bench. A Boolean difference subtracts one geometry from another. Use a solid difference to remove the top of the legs where they stick through the seat. To do this first extrude the surface of the seat upwards on the z-axis to create an cutting object, i.e. the geometry to subtract with. Then connect the unioned geometry as the first input - the geometry to subtract from - to a solid difference. Connect the extruded cutting object as the second input - the geometry to subtract with. Add a custom preview with a color swatch to better visualize your design.
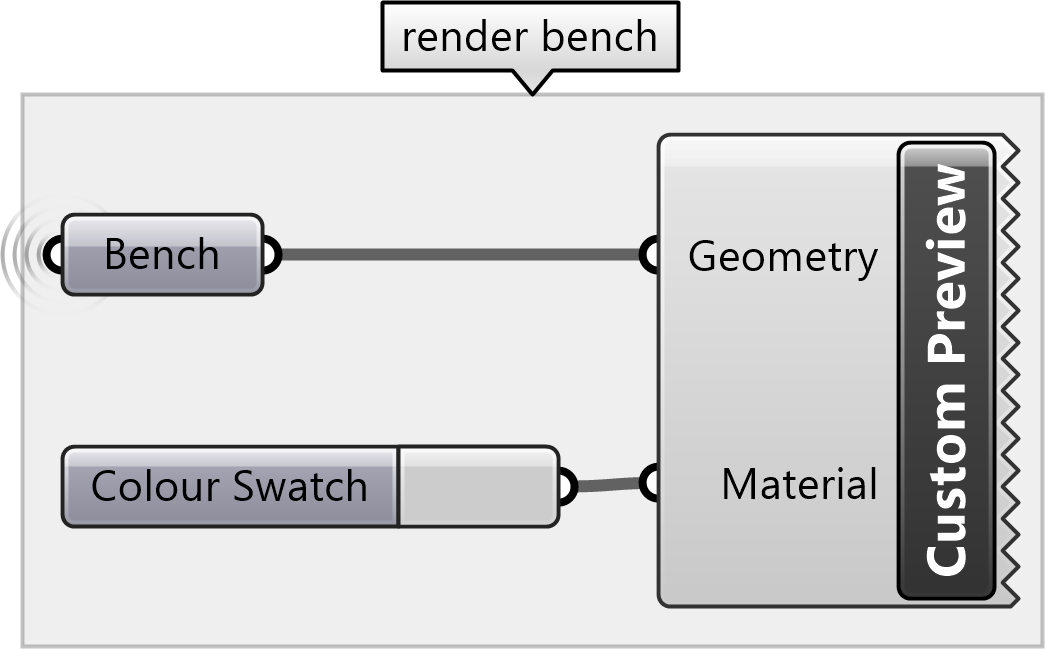
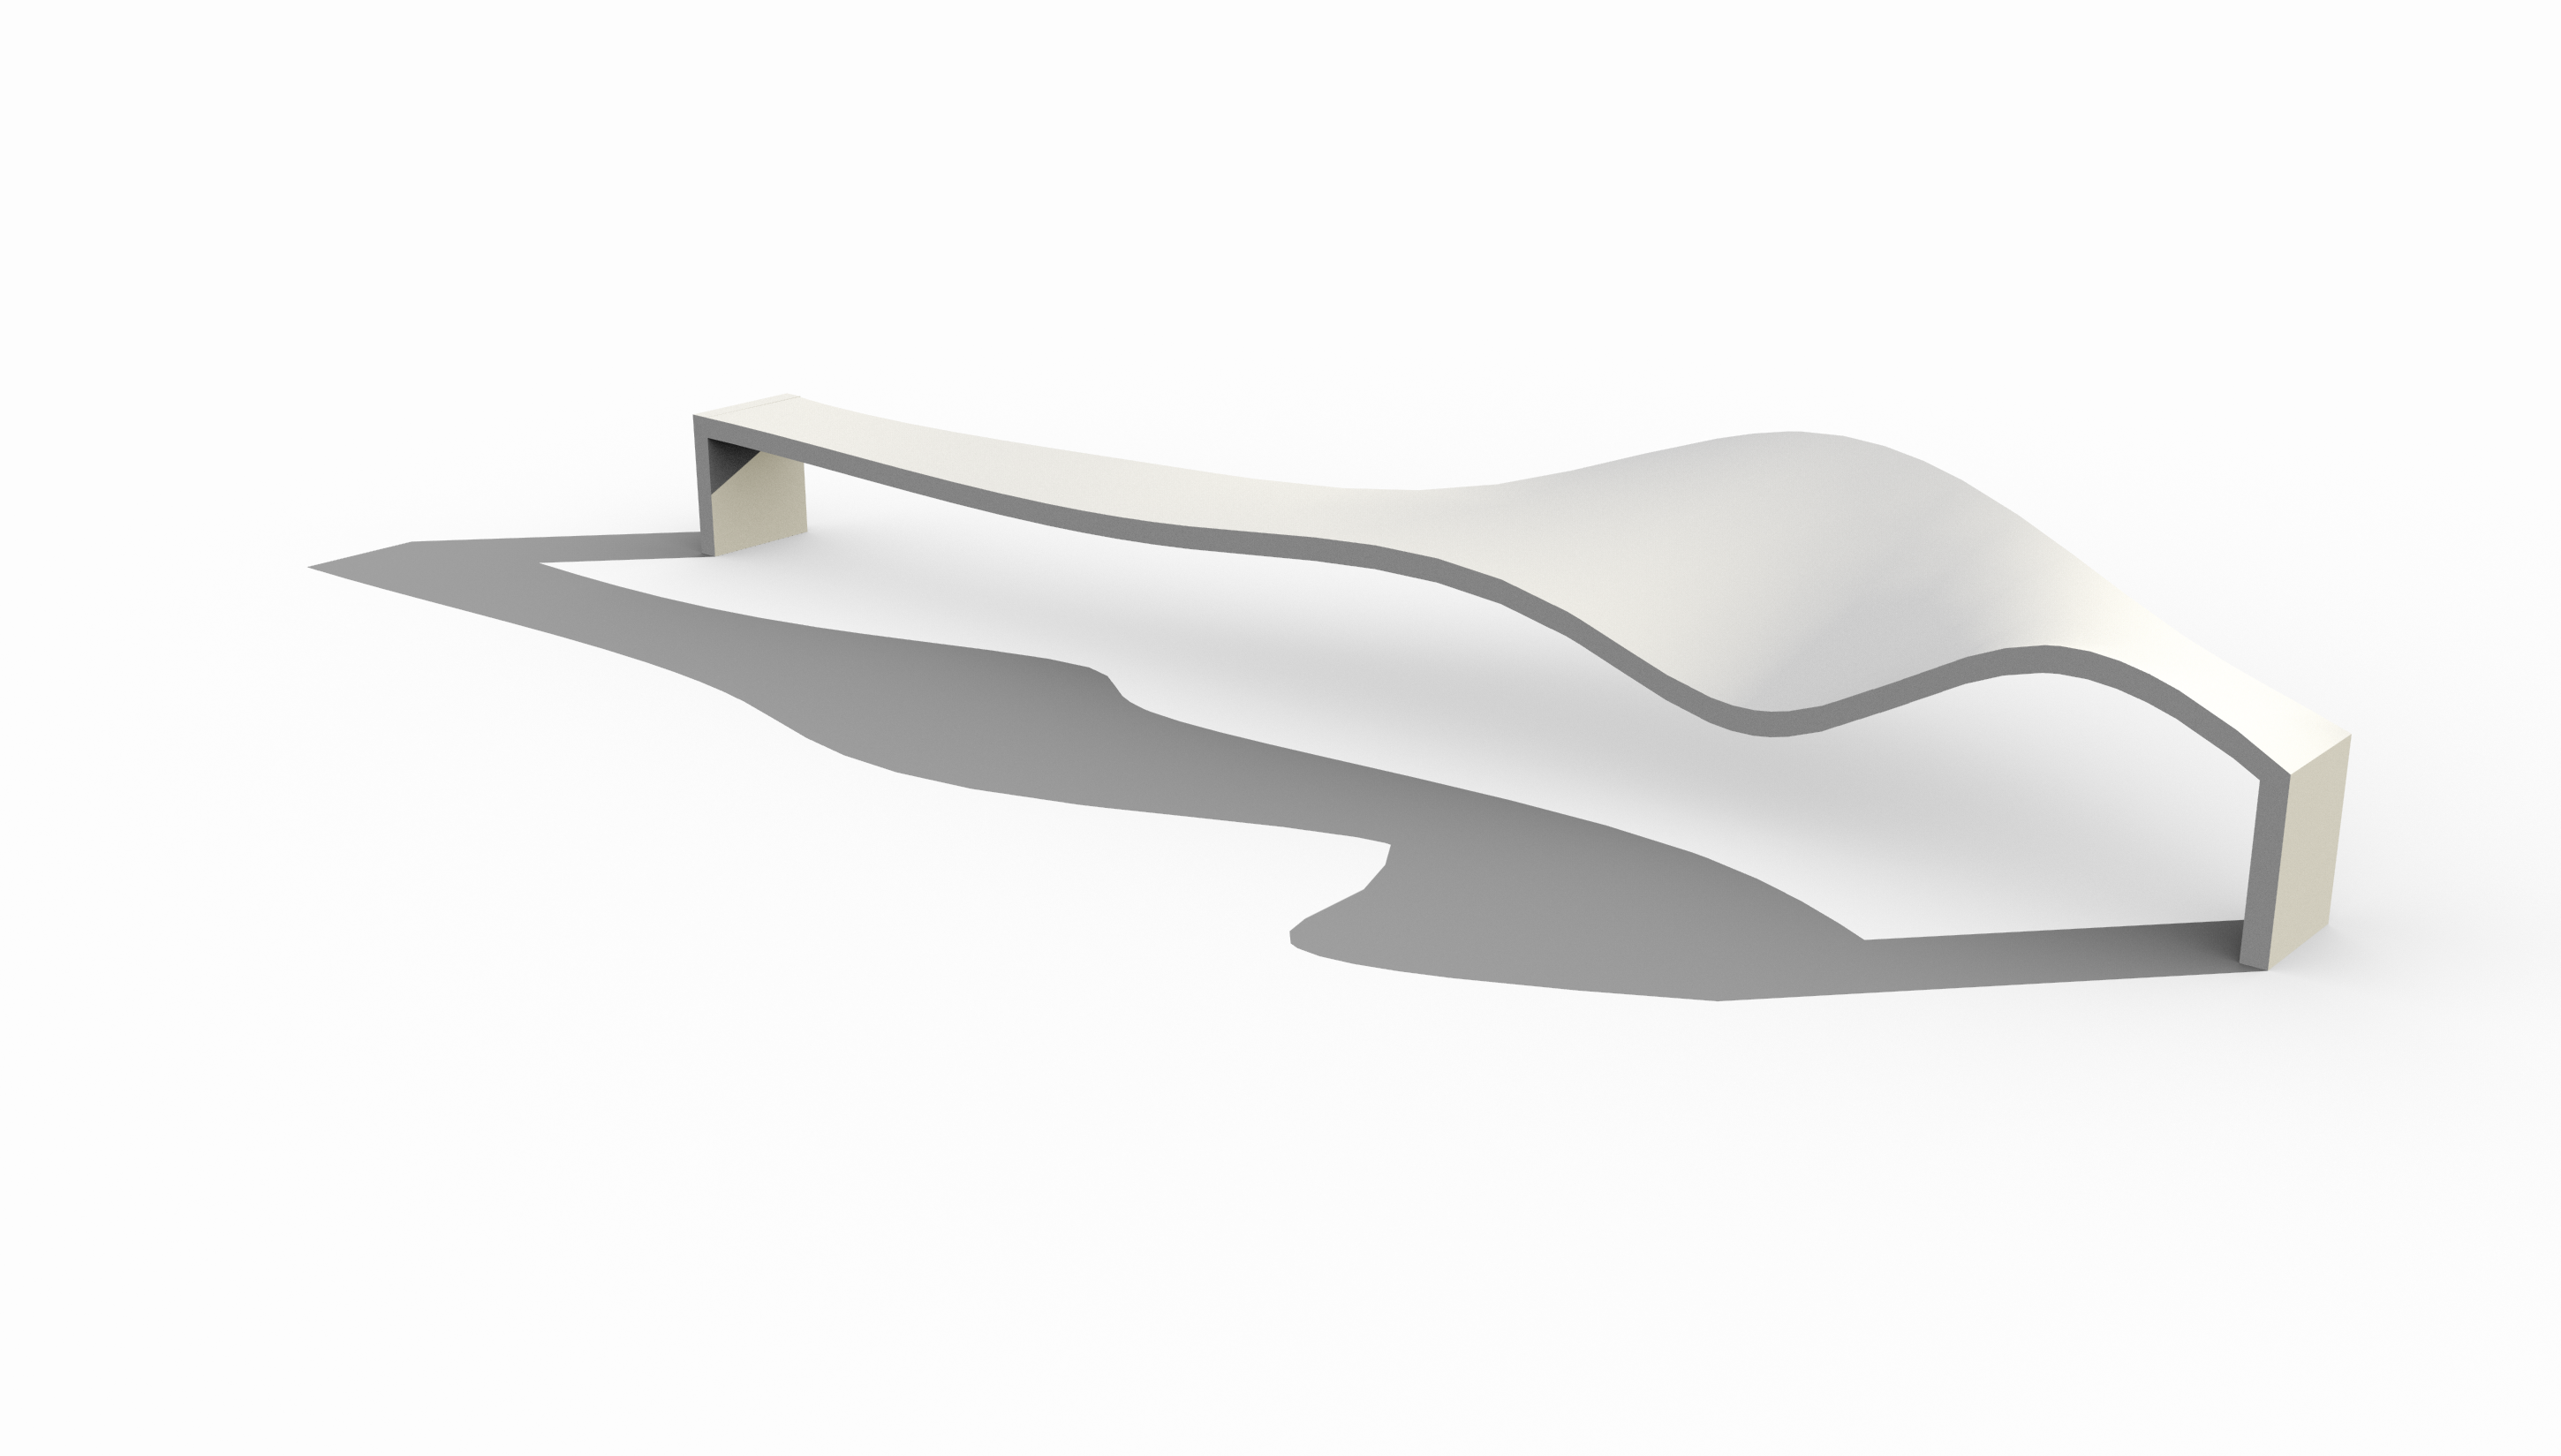
Rhino Render
Custom previews from Grasshopper will be rendered in Rhino.
To save a simple rendering of the bench using Rhino Render,
first add lighting to the scene,
then change the render settings,
and render the scene.
To add daylight to scene,
run the command
sun
in Rhino’s command line
and then set the time and location.
To change the render settings,
run the command
rendering
or open the rendering panel in the sidebar.
Set the dimensions to the current viewport
set the resolution to 150 dpi or higher,
and set the quality to good or final.
Use the
render
command to start a rendering.
When it finishes use hit save image as to export a .png.
Thea Render
To make a high quality ray traced rendering with Thea for Rhino,
disable the custom previews components in Grasshopper,
bake the extruded geometry to Rhino,
add a Thea material,
change Thea’s rendering settings,
and then render using Thea Darkroom.
First right click on the custom preview components in Grasshopper
and disable them so that they are not rendered in Rhino.
Then bake the extruded seat and legs of the bench to Rhino.
Add lighting such as the
sun
to the scene.
Add a material such as concrete from
the Thea Content Browser to the baked geometry.
In the Thea panel of the sidebar
turn on soft shadow and uniform illumination in the environment tab
and sync the resolution with the current Rhino viewport in the camera tab.
Then open Thea Darkroom, set production mode, and start rendering.
When the rendering finishes,
adjust the exposure and filtering settings
and then hit save image to export a .png.
Download the Rhino model with Thea Render settings.