Cartography in QGIS
Contents
- Download Data
- Import and Package Data
- Azimuth Orthographic Projection
- Extract a Continent
- Themes
- Print Layout
Download Data
Find raster and vector data of the world in the Natural Earth collection. Download and extract:
- 1:10m Countries
- 1:10m Lakes
- 1:10m Rivers & Lake Centerlines
- 1:10m Rivers Europe Supplement,
- 1:50m 15° Graticules,
- 1:50m Natural Earth I with Shaded Relief and Water
- 1:10m Natural Earth I with Shaded Relief, Water, and Drainages
The coordinate reference system
for these datasets is the
World Geodetic System 1984 (WGS84).
Move these datasets to
a new directory
on your computer called natural_earth.
Import and Package Data
Start QGIS with an empty project.
In QGIS’ Browser browse
to your
natural_earth directory.
Consider adding it to your favorites.
Right click on the natural_earth directory
to create a new
GeoPackage
called natural-earth-from-space.gpkg.
Then save the current project as
natural-earth-from-space.gqz
in the natural_earth directory.
In QGIS’ Browser drag and drop
the following into natural-earth-from-space.gpkg:
ne_50m_graticules_15ne_10m_admin_0_countriesne_10m_lakesne_10m_rivers_lake_centerlines_scale_rankne_10m_rivers_europeNE1_50M_SR_W.tifNE1_LR_LC_SR_W_DR.tif
This will import these data into the GeoPackage dataset for more efficient storage and easier portability. In QGIS’ browser double click on the data in the GeoPackage to add them to the map.
Start by turning off all layers except for the countries and graticules. Style the countries with a simple fill with fill color set to grey, stroke color set to white, and a stroke width of 0.2. Style the graticules with a simple line in black with a stroke weight of 0.3.
Azimuth Orthographic Projection
Locator maps simply show where a project located.
They can be inset in more detailed maps to
establish a wider context.
Use an
azimuth orthographic projection
to create a globe for an inset map.
First set a predefined azimuth orthographic projection.
In the project menu, select properties.
In the properties dialog, select the CRS tab
and search for the The_World_From_Space projection.
Copy the PROJ definition for this projection.
You will use it to make a custom projection
in the next step.
To set a custom azimuth orthographic projection
centered on your study area,
go to the settings menu
and select custom projection.
Use the plus button to create a new CRS,
name it Custom_World_From_Space,
set the format to proj string,
paste the PROJ definition for the
The_World_From_Space,
and then edit it.
Adjust lat_0 and lon_0,
the latitude and longitude
of natural origin
to focus on your study area.
+proj=ortho +lat_0=42.5333333333 +lon_0=-0.5 +x_0=0 +y_0=0 +ellps=sphere +units=m +no_defs
Back in project properties in the CRS tab,
search for your new Custom_World_From_Space projection
and set it as the CRS.
Then in the custom CRS dialog,
try adjusting the Latitude and Longitude
of natural origin value to rotate the globe
until it centers on your study area.
For this tutorial, focus on Europe.
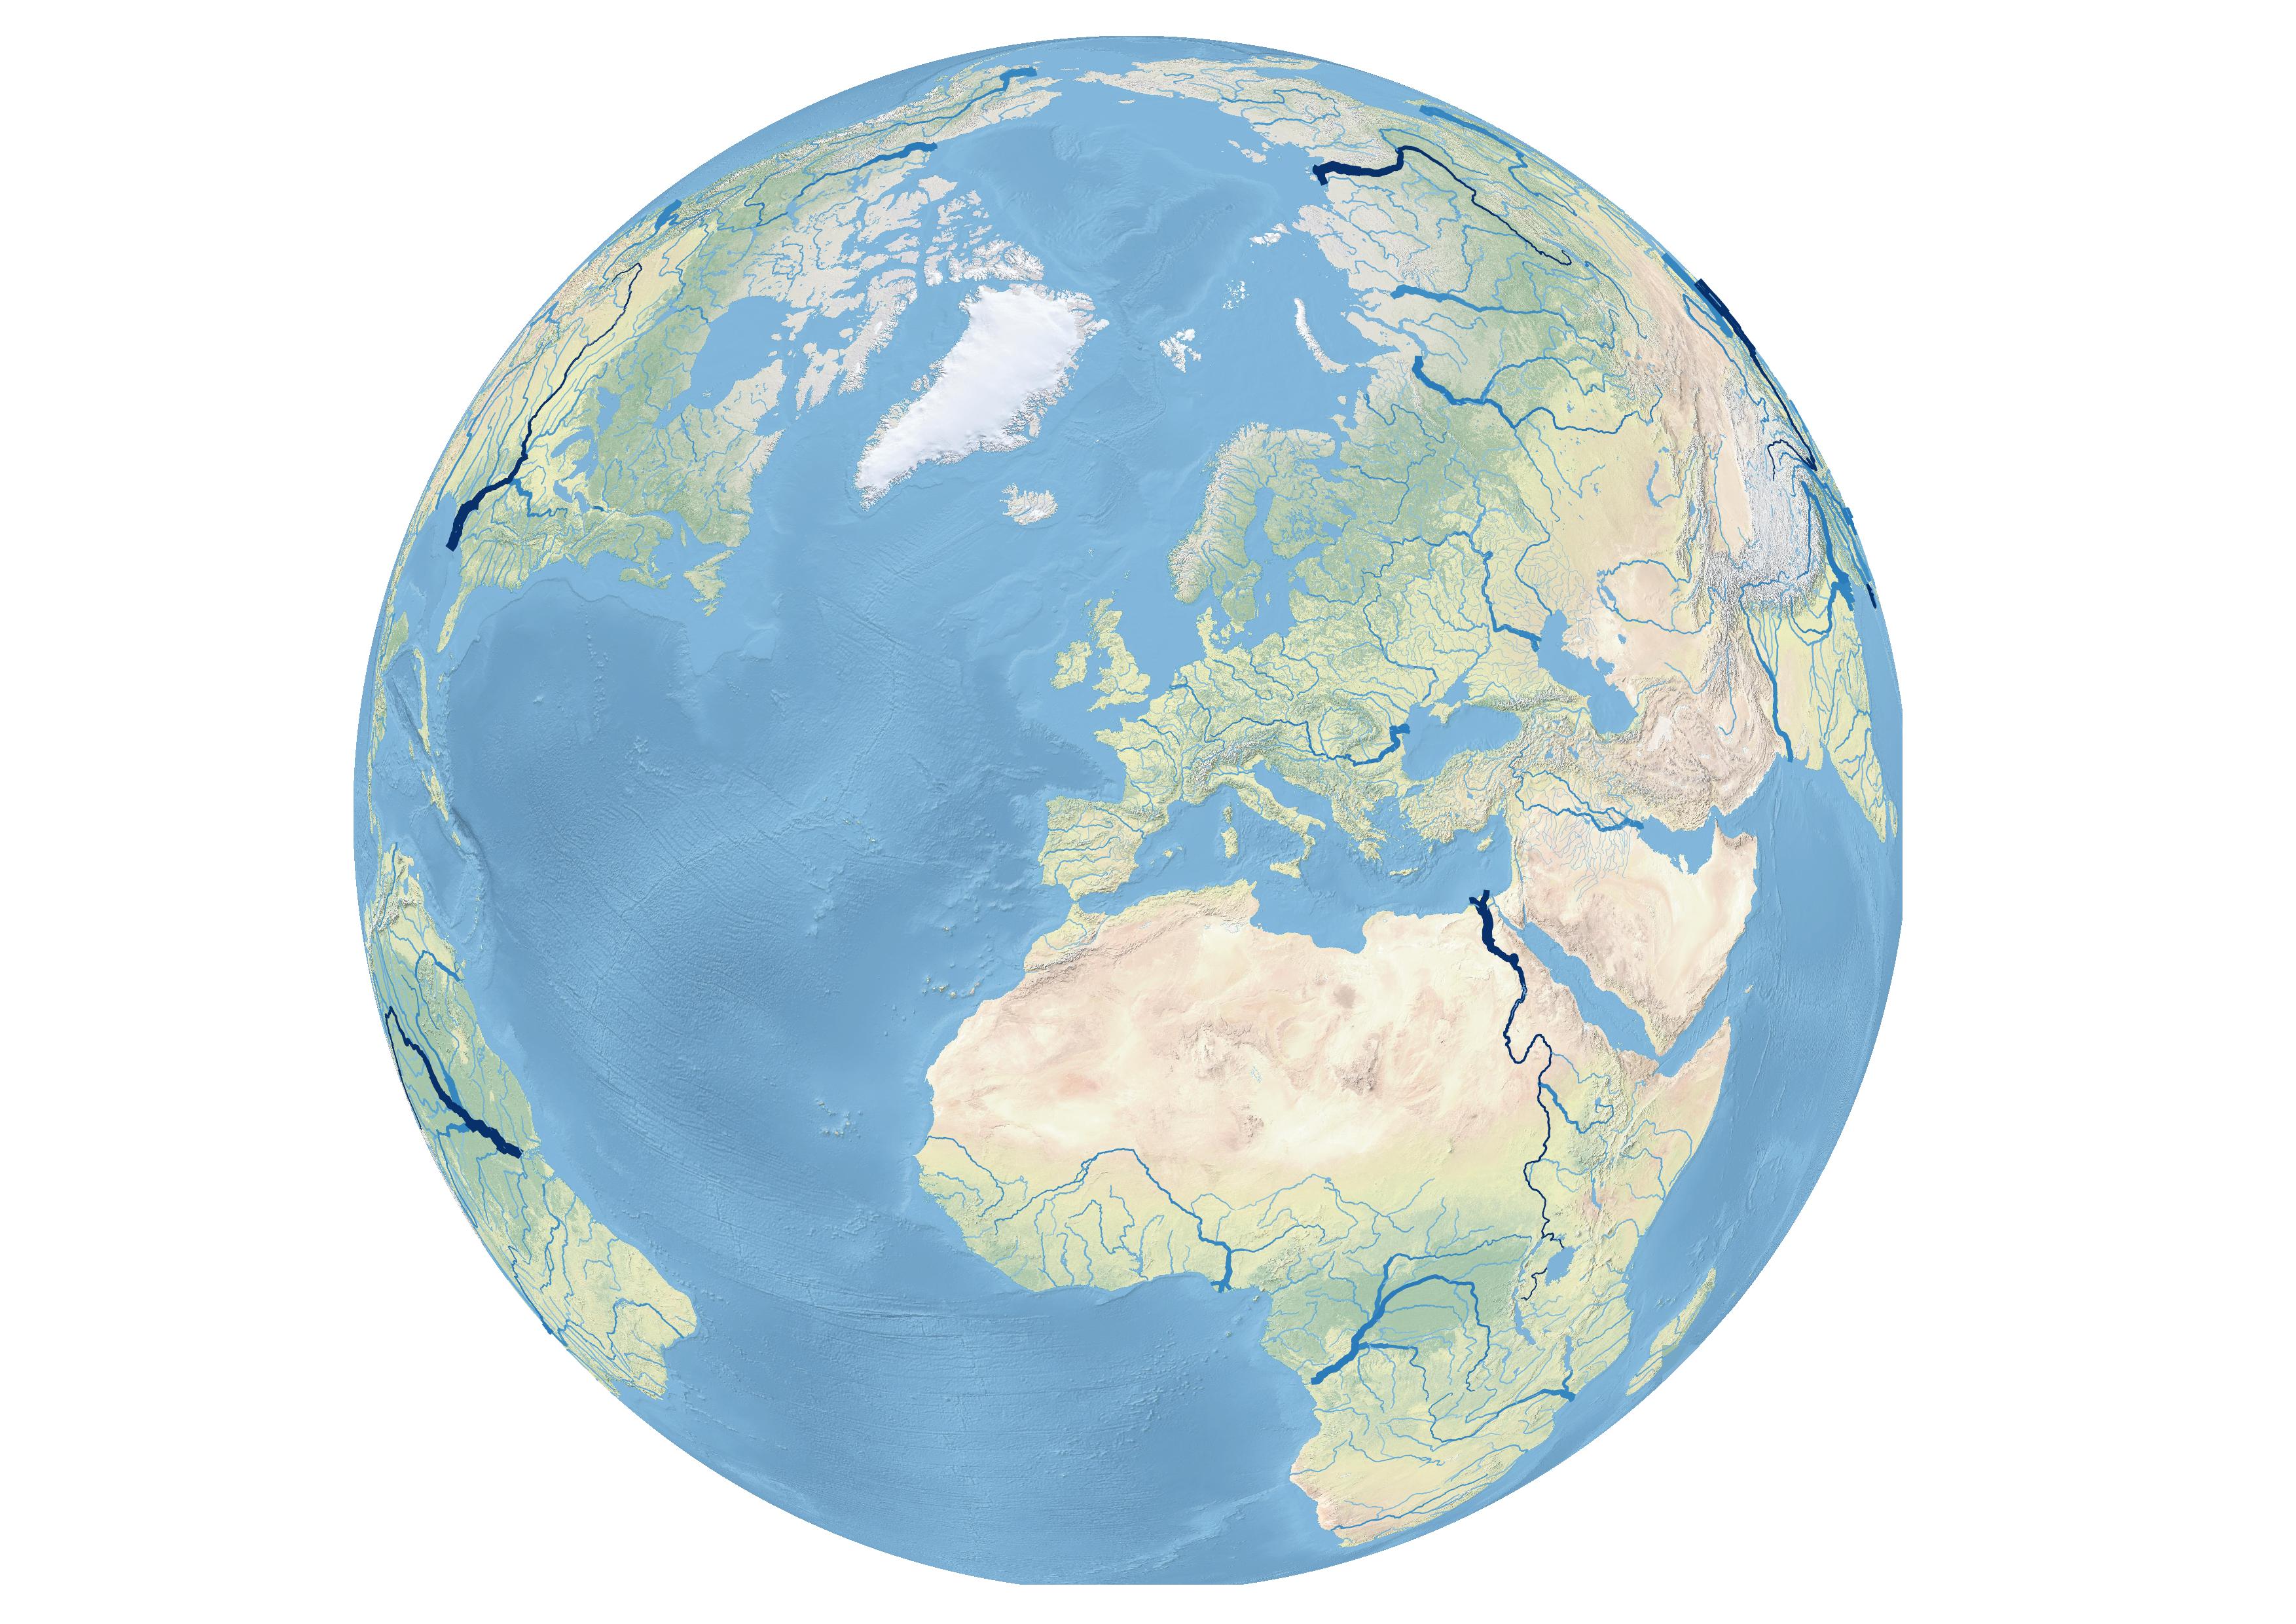
| Azimuth Orthographic Projection |
|---|
 |
Try turning off the
ne_10m_admin_0_countries
vector layer
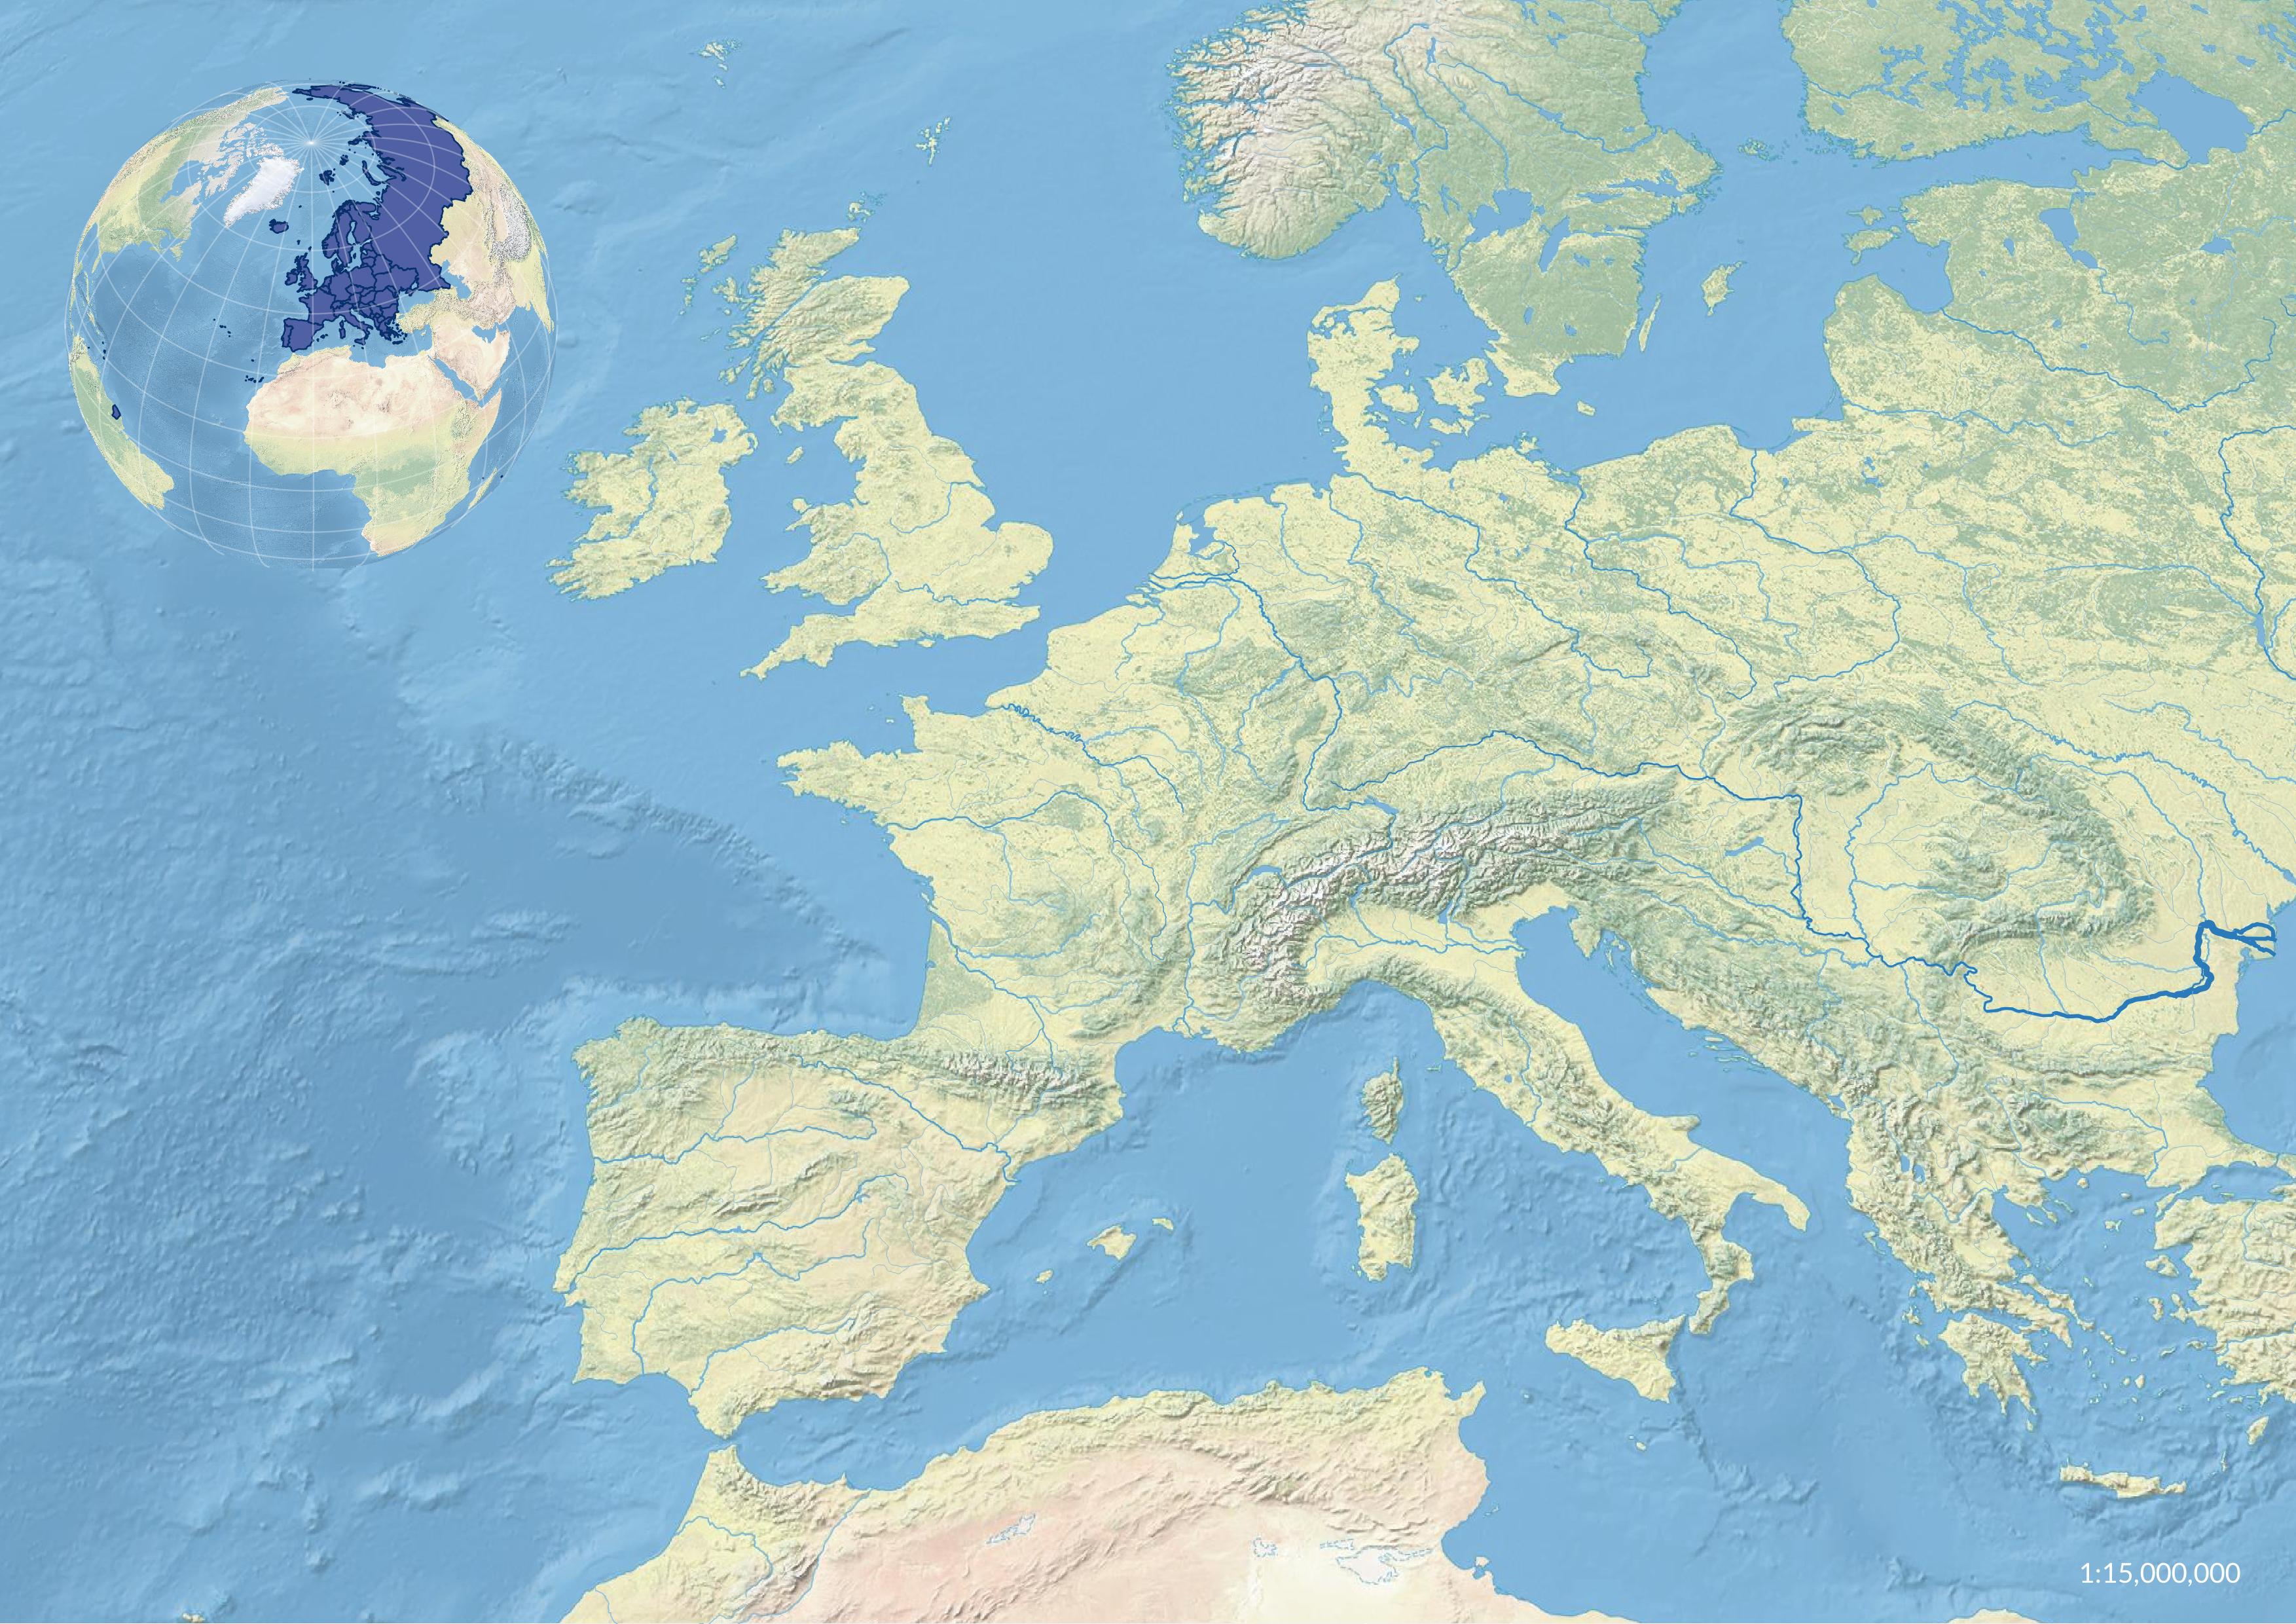
and turning on the
NE1_50M_SR_W
raster layer.
| Azimuth Orthographic Projection of Natural Earth |
|---|
 |
Extract a Continent
Extract a vector map of Europe from
ne_10m_admin_0_countries
to show your study area on the locator map.
In the Plugins menu
select manage and install plugins.
In the Plugins window
check the Processing plugin.
This is a core plugin
so it does not need to be installed,
but it does need to be activated.
The spatial data processing framework for QGIS
has algorithms for geospatial computation.
A panel with the Processing Toolbox
should appear on the right side
of your main QGIS window.
In the Processing Toolbox browse
in Vector Selection for
Extract by attribute.
Run Extract by attribute.
Set the input layer to ne_50m_admin_0_countries, set the selection attribute to CONTINENT, set the value to Europe, and set the matching features to ogr:dbname='natural_earth.gpkg' table="europe" (geom).
Nota bene: use the full file path for natural_earth.gpkg.
Themes
You can save different arrangements and styling of layers as themes. Themes are very useful for setting up print layouts with multiple maps with different styles. To style the locator map differently than the main map, create a theme for each.
Set up a theme for the locator map. For example arrange the following layers in order from top to bottom:
ne_50m_graticules_15europeNE1_50M_SR_W.tif
Style the graticules as simple line in white.
Optionally, set graticules’ opacity to 50%.
Style europe with a simple fill
with a blue fill and a dark blue stroke.
Create a new map theme by
selecting the manage map themes button
in the layers manager.
Choose add theme to create
a new theme called globe.
Set up a theme for a map of rivers in Europe. For example arrange the following layers in order from top to bottom:
ne_10m_lakesne_10m_rivers_europene_10m_rivers_lake_centerlines_scale_rankNE1_LR_LC_SR_W_DR
Style lakes with a blue sampled
from the ocean in the Natural Earth raster
with a transparent stroke.
Style the supplemental European rivers
with a blue stroke with a weight of 0.075.
Style the rivers with blue strokes
weighted based on stream order.
Set a data defined override
for the stroke width.
In the data defined assistant
set the source to strokeweig,
refresh the input values,
and set the output value size from
0.1 to 1.25.
Consider adding labels for the larger rivers.
Create a new map theme by
selecting the manage map themes button
in the layers manager.
Choose add theme to create
a new theme called map.
Print Layout
In the project menu
select new print layout
and create a new layout
called rivers-of-europe.
The print layout window will open
with a blank canvas.
In print layout create
a
map of European rivers in a projection
such as Lambert Conformal Conic
with an
inset locator map
in an azimuth orthographic projection.
Use the add map button in the toolbar
on the left side of the print layout
to draw a new map canvas.
First add a map spanning the whole canvas.
In the items panel,
select and rename this as map.
In the item properties panel
under the main properties section
set the CRS to a projection such as
Europe_Lambert_Conformal_Conic.
Set a fixed scale such as 15000000.
Then in the layers section
check follow map theme
and set the theme to map.
Add a scale bar your map. Select it in the item panel, then in the item properties panel set the style to numeric.
To create the inset locator map
add another map to the canvas.
Click the add map button and
drag and drop a small square window
in the upper left corner of the canvas.
In the items panel,
select and rename this as inset.
In the item properties panel
under the main properties section
set the CRS to Custom_World_From_Space.
Set a fixed scale such as 200000000.
Then in the layers section
check follow map theme
and set the theme to globe.
Uncheck background to hide
the white background behind your globe.
Finally use the export as image button
to export your map as a .jpg .
| Rivers of Europe |
|---|
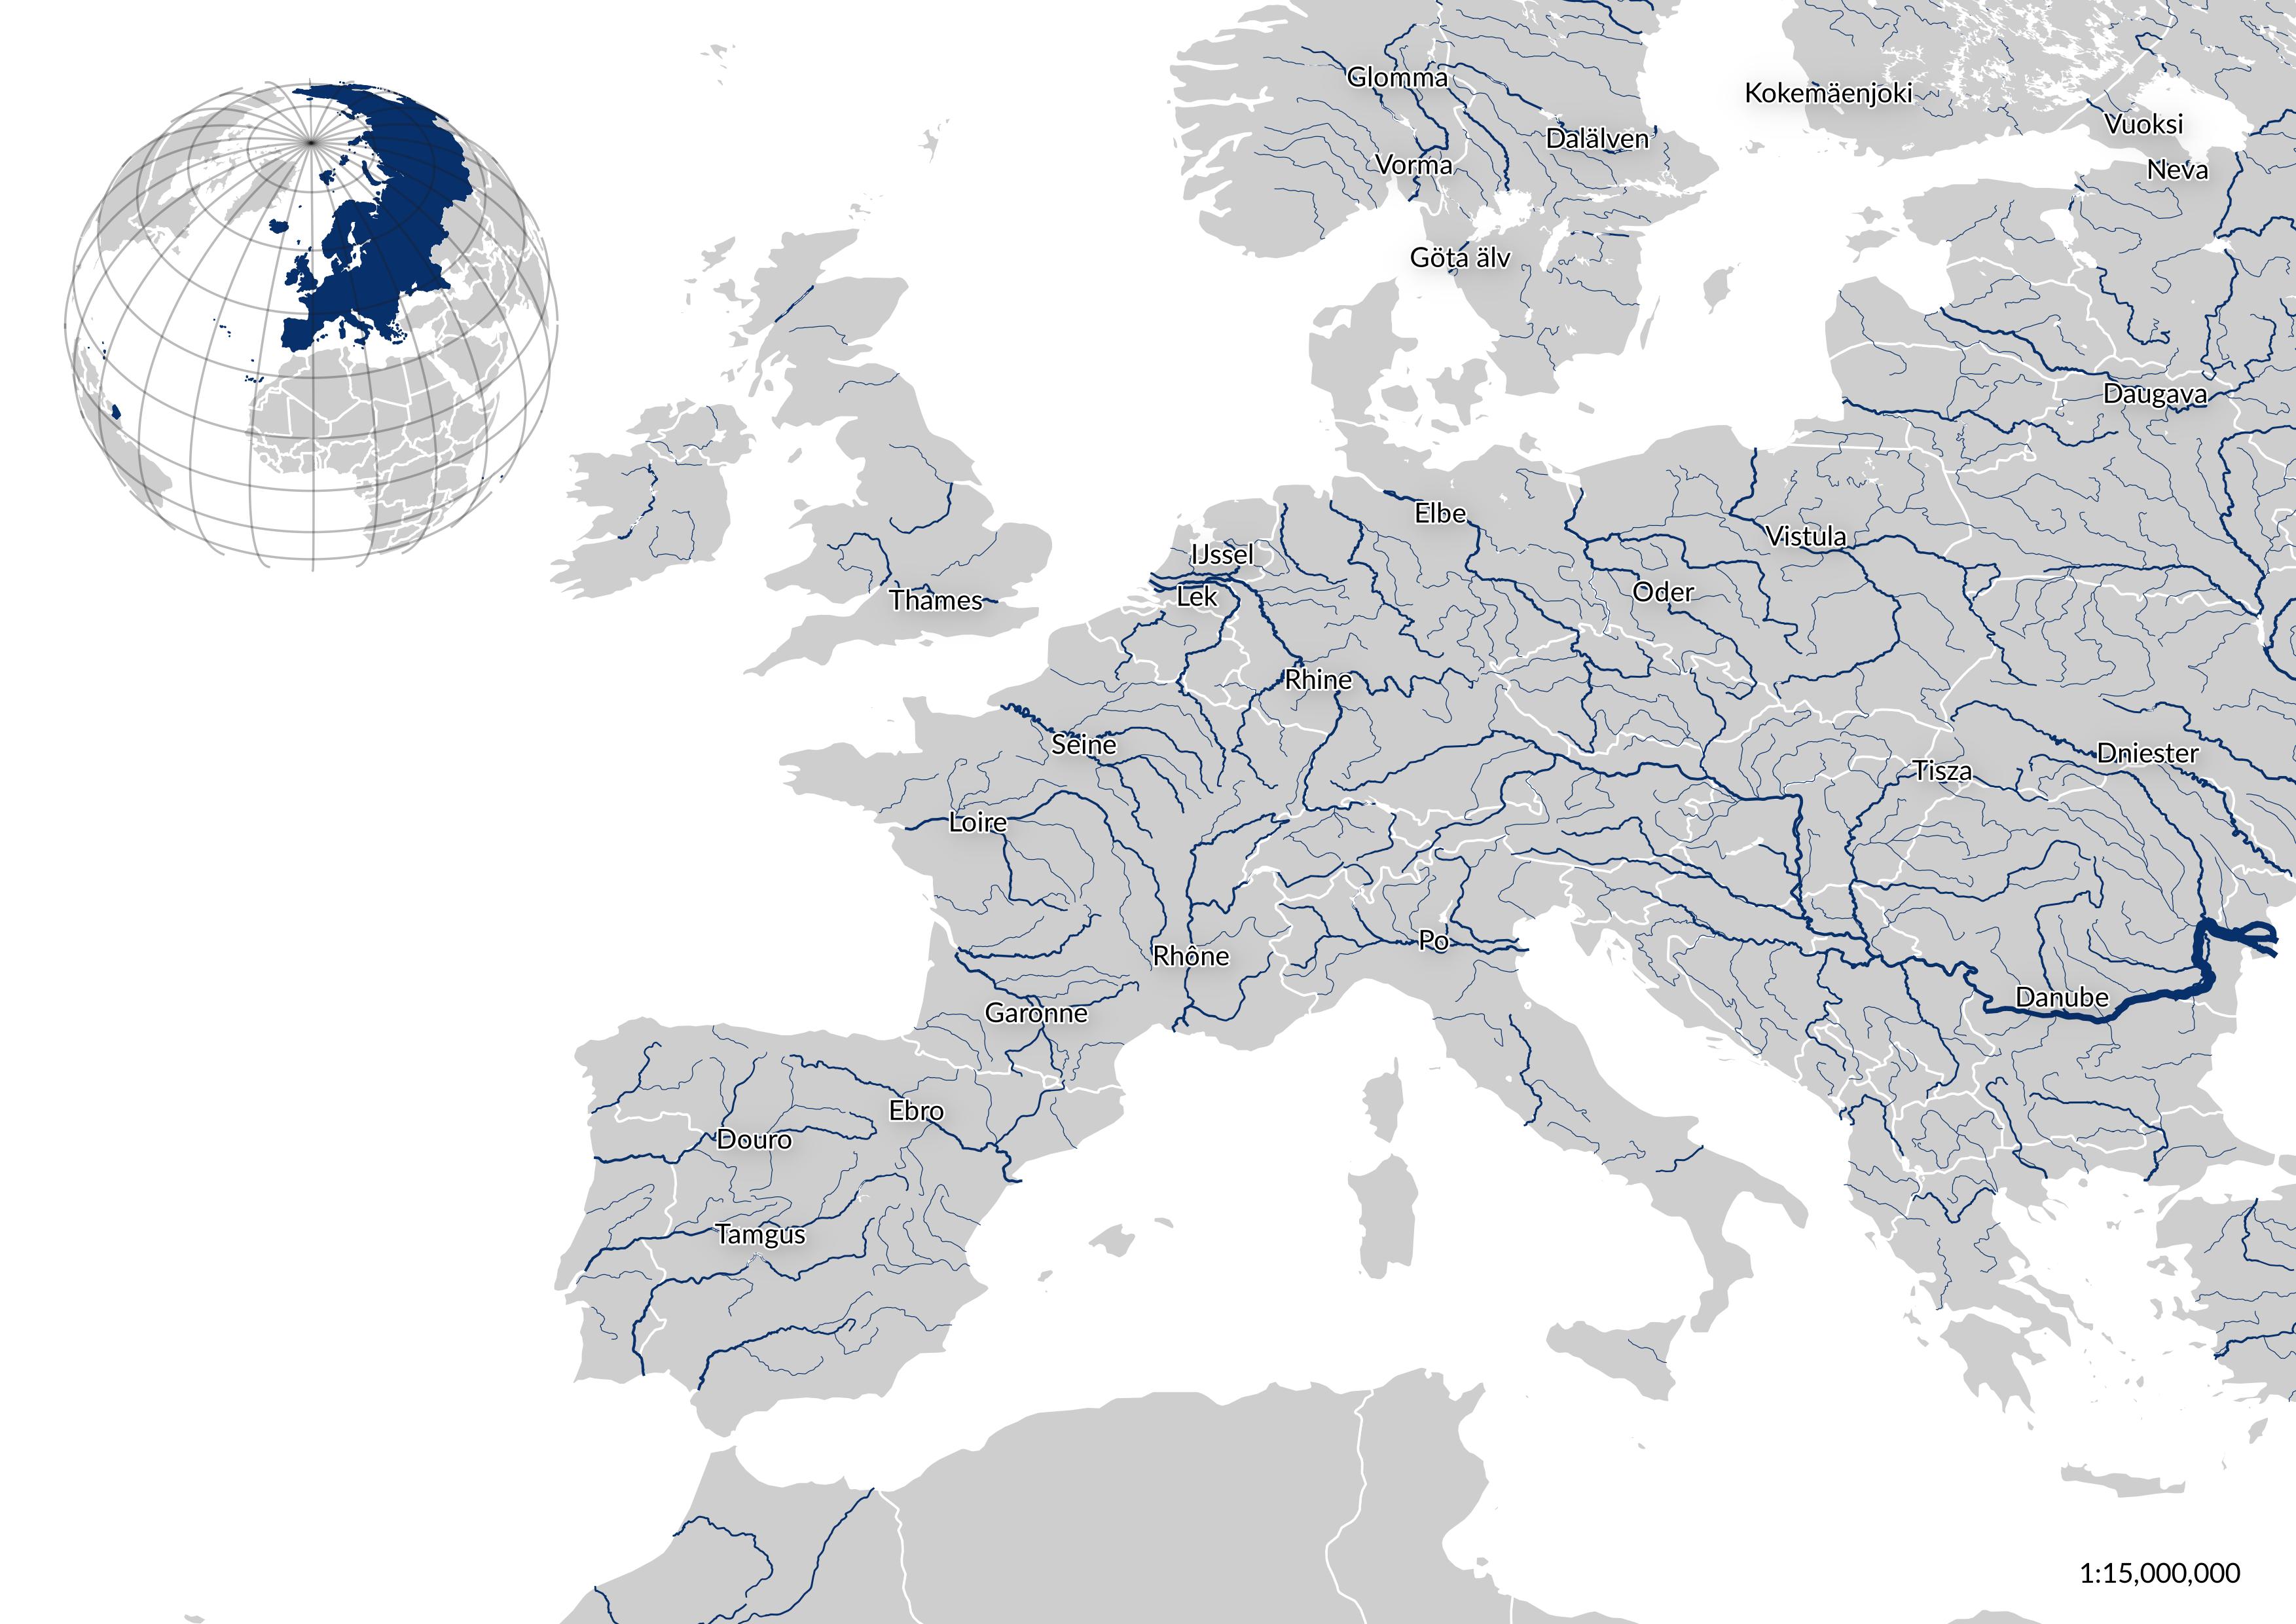 |
| Natural Earth Map of Europe with Rivers |
|---|
|